**Heads up: This post contains affiliate links. As an Amazon Associate, I earn from qualifying purchases. Meaning I may receive a small commission– at no cost to you, of course– were you to make a purchase through any of the links. If I link to a product, I use it, I love it, and I think you would too! Please see my Privacy Policy for more details.
In the world of furniture upcycling and flipping these days, most people think that making wood furniture repairs means that you will need to paint the piece to cover it up.
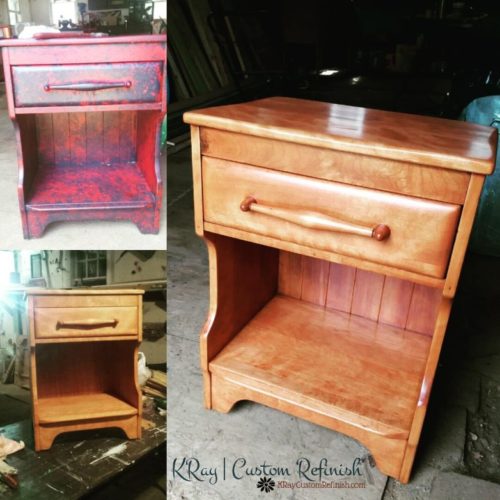
As you can see by the photo below, that is most definitely not true! Today, I’ll show you 3 Simple Tricks For Staining Wood Filler or Wood Glue Furniture Repairs, so that you don’t have to paint over them! Repair a wood furniture piece like this Cushman Colonial Creations Side Table, and let its original beauty show!
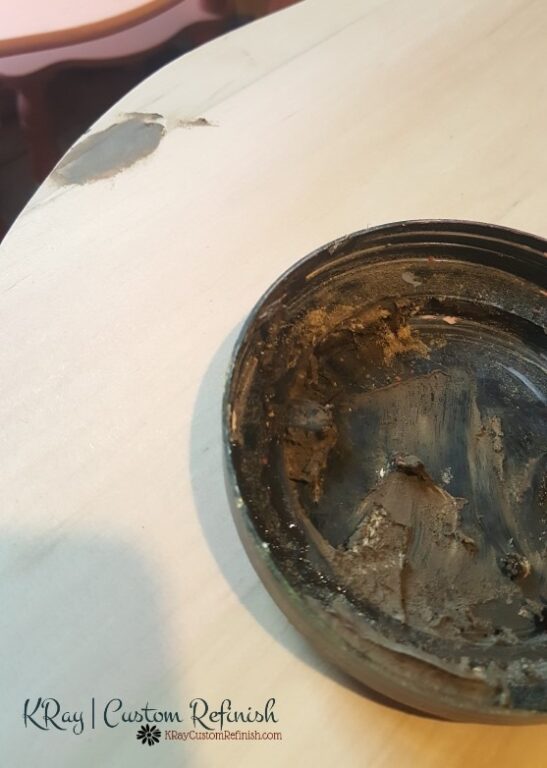
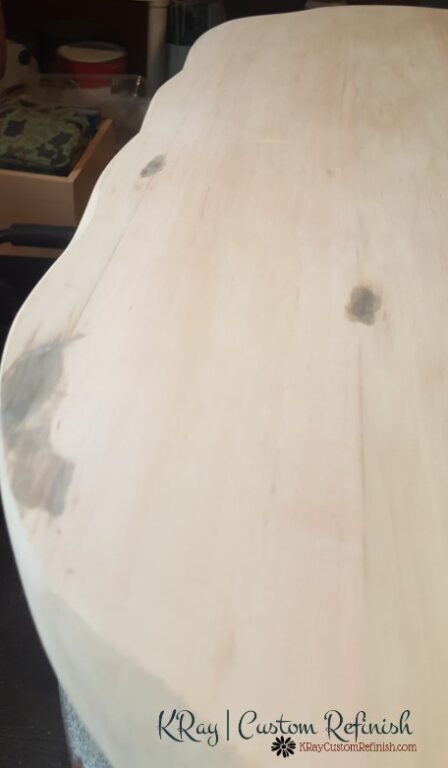
The top pieces of this side table were separating from one another pretty badly. It wasn’t noticeable until after I completely stripped the paint off, which is yet another reason I believe you should always strip and sand furniture before painting it!
Click to learn the stripping paint method that sucks the least.
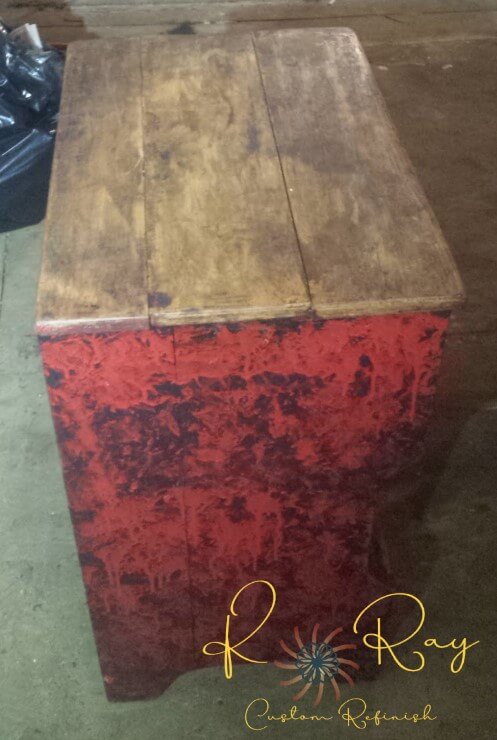
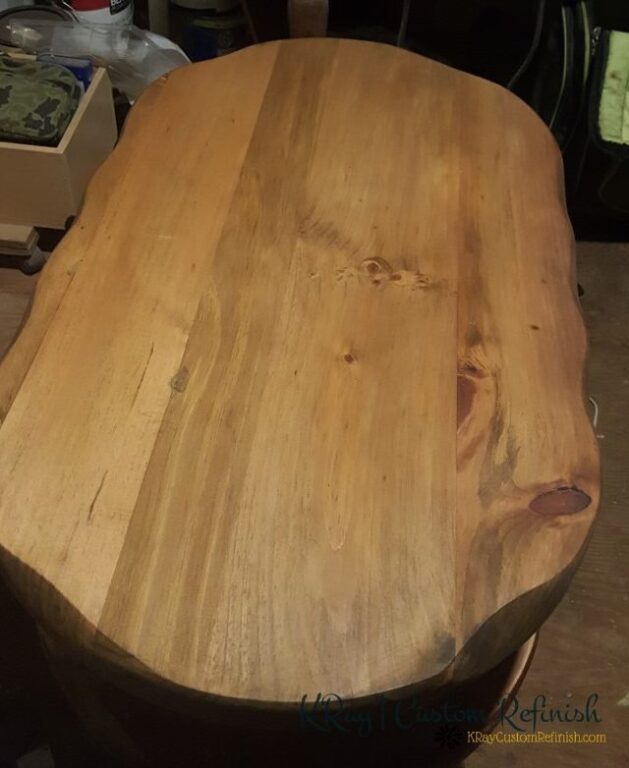
With the help of my Kreg Jig (the coolest tool in the world), some clear wood glue, and 1 of the tricks I will be talking about today – This Cushman Colonial Piece came out beautifully – stained back to its original beauty.
I’m all for painting wood furniture, but there are just some pieces that deserve to let their gorgeous wood show!
Of course, if that gorgeous wood has an ugly line of wood filler going right down the center of it… that pretty much ruins the whole look! Older furniture is obviously going to have its issues, and it’s going to need to be repaired. The trick is to disguise those repairs so they don’t stick out like a sore thumb!
Before you get into your repairs, I would recommend you acquire 3 or 4 items if you don’t already have them:
Clamps:
Irwin Clamps are my personal favorite. They work perfectly for holding wood together around edges and moldings or cracks you will be filling.
For larger areas you may need clamps like these:
They work great for holding together chair legs, or cracks in the wood you will be gluing together.
and this wood filler:
Elmer’s E-890 Stainable Wood Filler, 8 ounce – $3.58
from: Hardware World
This filler is my favorite because it is stain-able, and hardens extremely well.
For more of the products and tools I use every day, check out My Best Tools For Refinishing Furniture List: Part 1 and Part 2 (with the best cheap paints & stains)!
I also recommend Titebond Wood Glue for gluing parts together. It dries extremely quickly, and it dries clear which is super helpful with staining the wood, rather than covering it with paint.
What’s the first thing you should do before refinishing a piece of wood furniture?
Figure out the wood type.
Different woods require different methods for sanding, staining, painting, repairing, you name it.
After hours on Google comparing photos of hundreds of wood grains to your piece, are you more unsure than ever? Get the 169 page interactive eBook, “Grain”.
You may want to check out my Ultimate Guide For Wood Identification in Furniture before starting. It’s important to know what type of wood you’re working with when deciding techniques for restoration.
3 Tricks That Will Allow You To Stain Wood Furniture After Wood Filler Repairs
1 – Stain Pigment Q-tip Trick
2 – White Vinegar Glue Removal Trick
3 – Sanding Dust Filler & Stain Trick
Now my first trick may be possible with other stains, but I’ve honestly only had good results with one stain. Zar Wood Stain.
This stain is hands down my favorite to work with.
Now I know that most stain companies say that their stain is “the most even”, because of the incredible “whatever’s” added in and whatnot. But Zar is the only one that actually led me to believe that however they made it, truly makes it impossible for a crappy stain job!
The can states it has “controlled penetration” making it stain evenly. And I believe it. It seems like you could leave this stain on wayyyy too long, and at a certain point, it almost stops penetrating the wood. (I still don’t recommend doing that, but you know what I mean.)
So even if you slop it on, the wood gets stained one way, perfectly, every time.
I am not an affiliate for ZAR or United Gilsonite, but I will recommend them all day because their stain is just awesome. Plain and simple. For staining wood after wood filler, there’s no other stain I would use.
Now for the 1st repair trick.
Repair Trick #1: Stain Pigment Q-tip Trick
Use the pigment of wood stain to touch up areas you’ve repaired
Before you stir your stain, all of the pigment (coloring) settles to the bottom of the can. So if you scoop some of that pigment out of the can without stirring it in, it works perfectly for areas that were previously stained and have nicks or scratches now.
If you need to sand out the nicks or scratches, and not the entire piece, use the pigment to re-stain that area and get it to match the rest of the furniture piece.
It works wonders! Tilt the can a little and scoop the pigment out of the bottom of the can with a stir stick. Then use a small brush or Q-tip to touch up the spots you’ve repaired.
This also works on spots that you’ve tried staining and the wood filler just doesn’t get as dark as the rest of the wood. Take the pigment and rub it on the wood filler, and don’t rub it off. It may end up being a bit darker than the rest of the wood, but it’ll look like a knot and not a wood filler repair.
If you have to use wood glue at all on the repair here, I’d recommend trying my 2nd trick before applying the pigment.
Repair Trick #2: White Vinegar Glue Removal Trick
Create a mixture of White Vinegar 50/50 with bottled water in a spray bottle
After using wood glue to repair cracks or reattach pieces, spray down the entire area with your vinegar/water mixture, and wipe down with a clean cloth.
When staining wood after wood glue repairs, if any wood glue is left behind, it does NOT work well for staining.
You will be left with splotches where the stain did not reach the wood, whether the glue dries clear or not.
As long as you glue the area together correctly and don’t leave obvious spaces; using the vinegar/water mixture will leave you with a perfect stain and very small chances of the repair being noticed.
Need Help Organizing All of Your DIY Projects? Head over to my DIY Resources Page, download the DIY Project Planner Pages, and get organized!

Repair Trick #3: Sanding Dust Filler & Stain Trick
Collect the dust from sanding your piece, and mix it in with your wood filler!
This trick is my favorite. I use it quite often. 90% of the time when working on a piece, you will end up with some sanding dust. Even if it’s only a quick sanding, make sure you save that dust somehow!
The wood filler I mentioned above works great for this, but my personal favorite for this technique is Durham’s Water Putty.
It comes as a powder, so you can mix the sanding dust, and the wood stain into it almost in place of the water normally used to get it to consistency. (I wouldn’t recommend forgoing the water completely.)
A spray bottle works great to get this to consistency as well. A small amount of liquid goes a long way with this putty, so one spray at a time will help keep you from ending up overwetting it.
If you do happen to put too much water in, just add some more powder until it’s as thick as you’d like! That’s one of the reasons I love Durham’s Water Putty. It also hardens like a rock once dry, and never shrinks!
Make sure you fill the holes before staining the entire piece.
Push the filler or putty into the holes with a putty knife and smooth it out slightly over where you want it to be so you can sand it down to smooth.
Then stain the rest of the piece as usual. Try to avoid re-staining the wood filler areas so it doesn’t end up darker than the rest of the wood.
If you end up doing a second coat of stain, add it over the filler this time, so the shades will match.
Once you’ve completed the entire piece and top coated it, the filled spots should blend in perfectly!
Obviously, they aren’t invisible, but with a piece like this (and most pieces) they can easily pass for knots in the wood.
I only recommend trying this for small fixes, if you have a larger fill, another option would be to use a wood graining tool like this one:
Use a thick stain, I’d recommend a gel stain to match – then imprint the wood grain pattern over the spots filled with filler using the graining tool, and you won’t need to pass them off as knots in the wood!
UPDATE: Recently, I learned of a new wood stain (well, new to me) that blows other wood stains out of the water for staining wood filler.
Which wood stain works best for staining wood filler?
If the wood filler has already been applied to the piece, try using a water-based wood stain containing Aniline Dye. The area may end up slightly darker than the rest of the wood, but it will stain. Whenever possible, mix the wood stain in with the putty before application, and mix in some sanding dust for a true match.
I’m a huge fan of saving furniture lives and allowing their original beauty to shine through. So if there is a chance to keep the wood stain on a piece, I will take it!
If you need more help with staining the wood after making your repairs and disguises, check out Preparing Wood For Staining, or How To Stain Wood.
Do you know of any tricks or tips to save wood furniture from being covered with paint? I’d love to hear them!
For weekly updates like this sent straight to your inbox, subscribe to my newsletter!
Next week I’ll be jumping into distressing wood furniture; painted and stained. Be sure to check back in!

KRay

