**Heads up: This post contains affiliate links. As an Amazon Associate, I earn from qualifying purchases. Meaning I may receive a small commission– at no cost to you, of course– were you to make a purchase through any of the links. If I link to a product, I use it, I love it, and I think you would too! Please see my Privacy Policy for more details.**
As a furniture refinisher, every piece you do is memorable and unique. But every now and then you hear from a client or find a piece you know will be a special one. So when I heard from Maxfield Real Estate’s, Jennifer Azzara, about Refinishing a Vintage Record Player Stereo Cabinet she was contemplating scooping up, I instantly knew this would be one of those times.
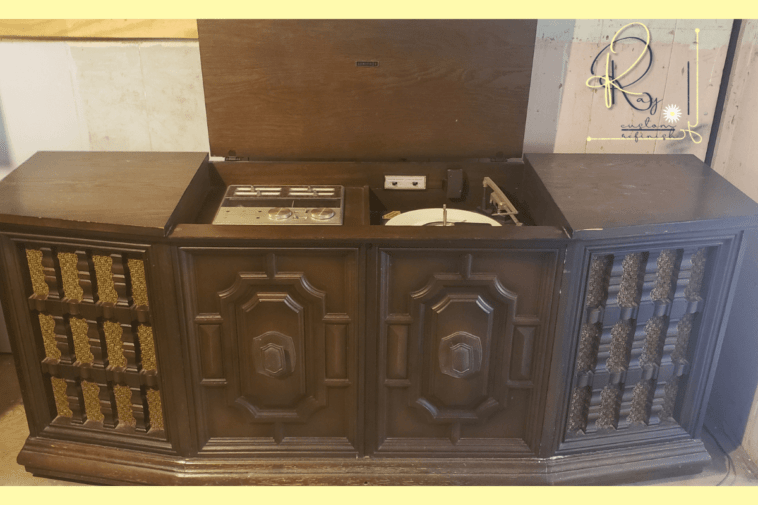
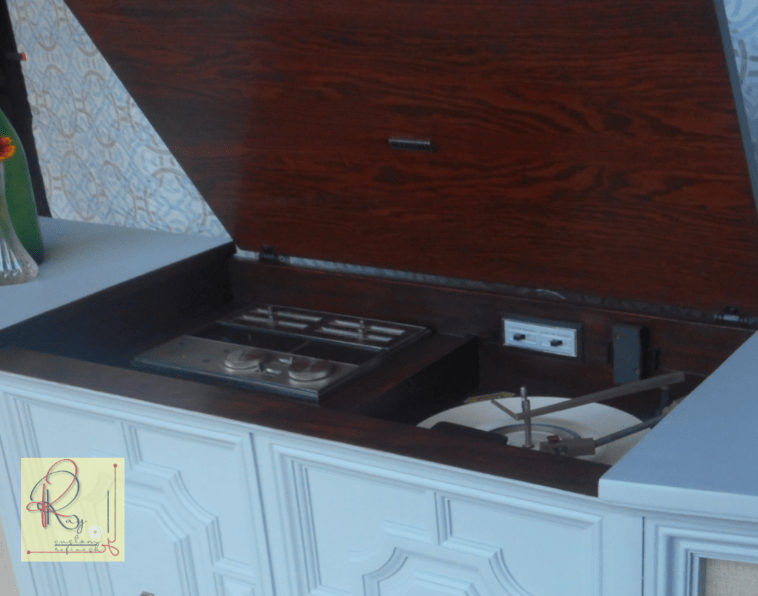
This gorgeous, 1961 Zenith Record Player Stereo Console was in close-to-perfect condition, and still worked great! She couldn’t believe that no one wanted it, and neither could I!
Currently upgrading their basement, Jennifer and her husband hoped to use the cabinet as a console table behind their sofa but wanted it painted and a bit more modern. So I went to work to find the perfect color to compliment her basement and brainstorm how to modernize it a bit.
Refinishing a Vintage Record Player Stereo Cabinet – Design Elements
The client first suggested a very light, white color. But then (luckily) decided light gray or blue options would work as well. I’m personally not a huge fan of most white colors so this opened up a ton of great options!
Ultimately, we decided on the gorgeous color from Melange Paint, “Devotee”.

Their online sample just doesn’t do it justice. But luckily I found some amazing images on Instagram that showed the actual tone which was a very light grey-blue color.
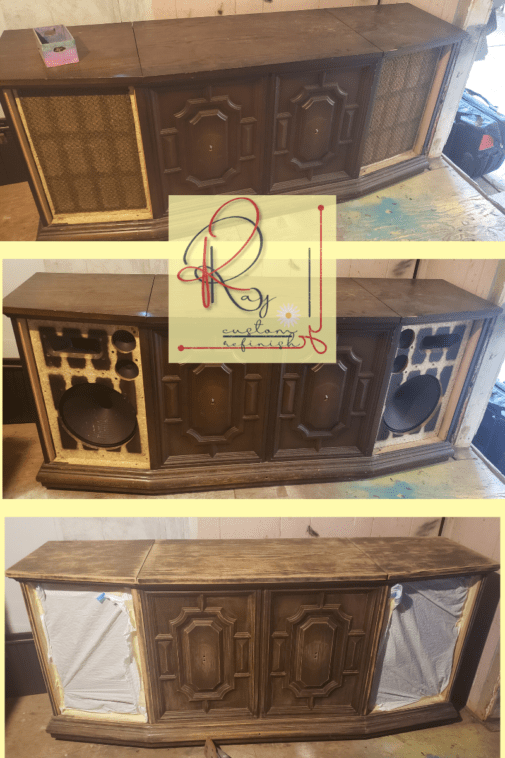
The next issue was the speakers. The speaker fabric and wooden grates over them were a bit gaudy, so removing those would make the piece look 20 years younger alone!
I’d never replaced speaker fabric before, but it turned out to be pretty simple.
Refurbishing the Speakers on a Vintage Record Player Stereo Cabinet
Frame & Speaker Cloth Removal
Working on a large Vintage Record Player Cabinet like this was actually quite easy. Everything inside was easily accessible from the back of the cabinet. Small screws held the back panels on. Once I removed those, I could access the speakers, hardware, electrical elements, as well as that ugly frame.
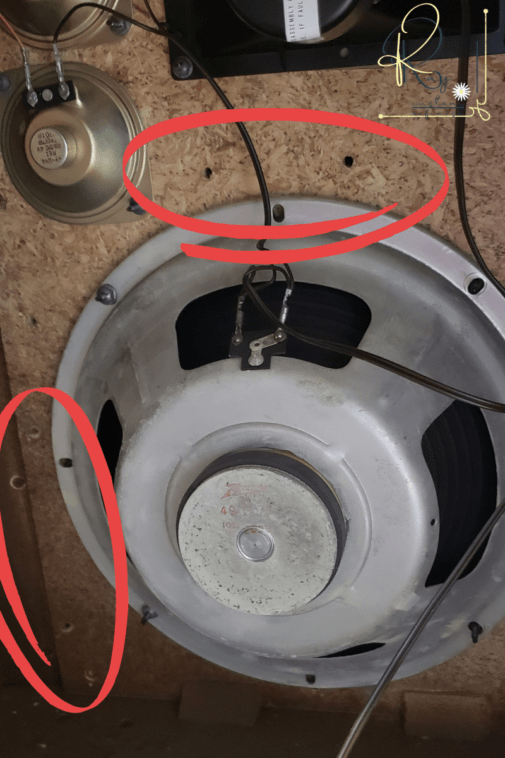
Once inside the back of the cabinet, all that needed to be done was the removal of a few screws.
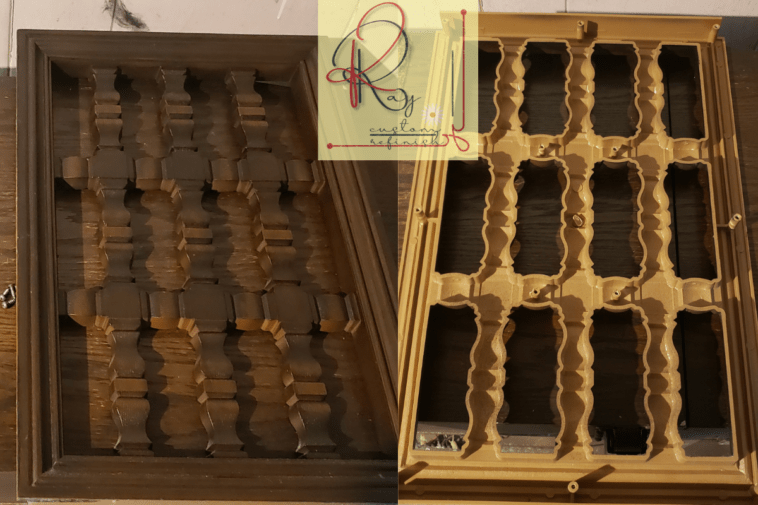
There were a total of 12 screws holding the front plastic frame onto the piece. 3 on each edge, and 4 in the center. Unfortunately, I did have to remove the speaker to find 2 of the screws in the center. (Which took a minute to figure out.) But the speaker was only held on by small washers that could be spun off easily by hand.
Once all 12 screws had been removed, the speaker front slid right out. Once it was out, I reattached the speaker to ensure none of the wires were disturbed.
Behind the plastic grate, the speaker fabric was attached to a board that was also screwed into the front of the cabinet. (Apologies for the poor photography.)
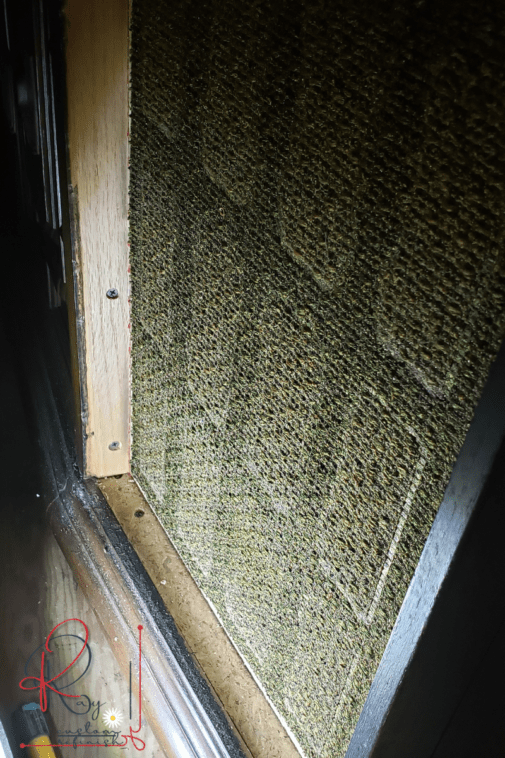
Small screws held the board on at each corner, as well as the center of the top and bottom edges. Once removed the fabric board popped right out. This left the speaker front wide open, so I covered it as soon as possible to prevent any dust from entering the speakers. Dust is the enemy of the speakers– or so they tell me.
Speaker Fabric Replacement on a Vintage Record Player Stereo Cabinet
The original speaker fabric was glued to a blackboard with multiple large holes to project sound. It was easily pulled off by hand. Before attaching the new fabric, the board needed to be sanded lightly to remove any old glue residue.
I was very impressed with the fabric I got to replace the old stuff.

It had a nice stretch but was also sturdy and ttogether very well. It did come folded so there were tons of wrinkles in it, but they came out easily with a little bit of ironing. Below is a step-by-step explanation of replacing the fabric.
How to Install New Speaker Grill Fabric on a Vintage Record Player Stereo Cabinet
Time Needed : 45 minutes
How to Install New Speaker Grill Fabric on a Vintage Record Player Stereo Console
Remove the old speaker fabric. Sand, and clean the grill Board.
There should be no old glue residue, dirt, or dust on the board.
Using the Speaker Cloth Adhesive, spread an even line around the edge of the board, where the speaker fabric will be attached.
This line of adhesive should be close to aligned with the screw holes along the edge. Make sure there are no breaks in the line. If there are, use a toothpick or other small object to connect any breaks.
Set the board aside for now.
The glue needs a few minutes to set up for proper adhesion.
Cut the fabric to slightly larger than the size of the board.
Leave an extra inch or so on all sides.
Use a mister or spray bottle to spray down the fabric with water.
The fabric should be damp, not soaked.
Iron out any wrinkles in the fabric.
Keep the iron set at the lowest setting possible. You should be able to put your hand on the iron without burning it. Any hotter, and you will burn the fabric.
Roll the fabric up like a map.
Keep the edges as even as possible.
Align the edge of the roll of fabric with the top of the board, keeping it as straight as possible.
It doesn’t have to be right at the edge, since you’ve left extra on each edge.
Then unroll the fabric onto the board, slowly moving from the top of the board to the bottom.
Do this very slowly, inch by inch, pressing down slightly on the side edge where the line of adhesive is. Once the fabric is completely unrolled, it should cover the entire board evenly.
Lightly stretch the fabric toward the edges to get it as tight as you can.
As the fabric slowly dries, it should also shrink up even more making it even tighter.
Trim the excess fabric off of the edges.
If you wish, you can rub glue along the edges to keep them from fraying.
Locate the 8 spots for screw holes on the board, and create small holes through the fabric at each spot using a small screwdriver or knife.
Don’t worry about the size of the hole, just poke through enough to get a soldering iron through.
Heat up your soldering iron, and poke through each of the holes slowly and out again.
This will singe the edges of each hole to not only stop the fabric from fraying but also prevent dust from getting through to the speakers.
Screw the board back onto the front of the speaker, and reinstall the frame.
Your speaker grille cloth has been replaced!
Tools
- Soldering Iron
- Scissors
- Tiny Screw Driver
- Clothing Iron
- Mister
Materials
Speaker Frame Redesign on Vintage Record Player Stereo Cabinet
Now that the speaker cloth was taken care of, I had to think about this plastic frame and grates. The entire frame was one solid piece. There was no “removing” the slats easily, unfortunately. My first thought was to scrape the frame altogether and build a wooden one.
But the frame is plastic for a reason. I didn’t want to affect any of the sound output by blocking it off with wood. So my other half decided to try cutting the slats off of the frame using his jigsaw.
I cannot explain exactly how he did it because; 1. I didn’t get to watch him do it, and 2. For safety reasons I cannot actually recommend anyone does this. But this is what he did, and it worked great as you can see in the image below.
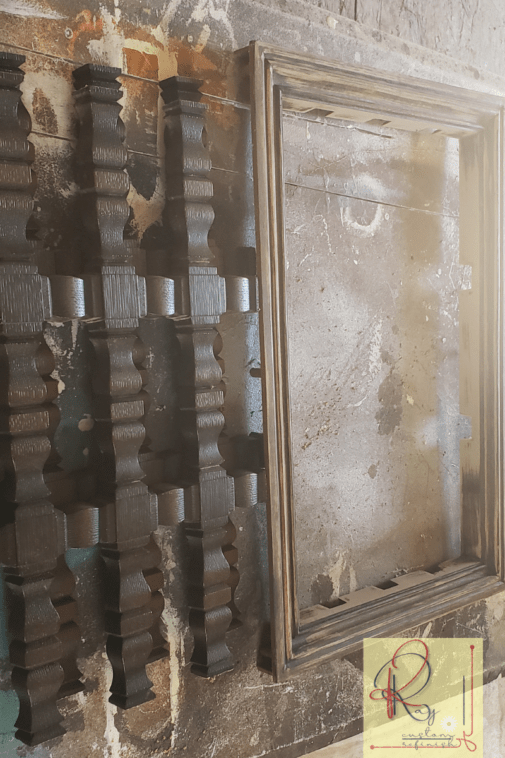
After that was done, some open slots were visible around the speaker cloth that just didn’t look right.

Scott cut 4 thin pieces of wood for each speaker to finish off the inside edges, and Brad nailed them to the plastic frame.
And voila! The speakers were officially “modernized”.
Refinishing a Vintage Record Player Stereo Cabinet – Painting the Body
Most of the front of this 1961 Zenith Record Player Stereo Cabinet was hollow plastic, but the top, sides, and bottom were all Oak hardwood with a very deep grain.
Now, this wasn’t going to be a gloss finish, so I wasn’t extremely worried about filling every little crack and crevice. But it still needed to be relatively smooth.
A good sanding with 80, and then 120 grit sandpaper smoothed it out nicely, but there were still lots of crevices from the deep and open oak grain.
I mixed up some of my favorite: “Durhams Rock Hard Water Putty“, and covered the entire top using a wide putty knife. I let it dry for a couple of hours, and then I sanded most of it off, leaving putty only in the wood grain. You could do the same with some Grain Filler, I just think this method is better, as well as cheaper.
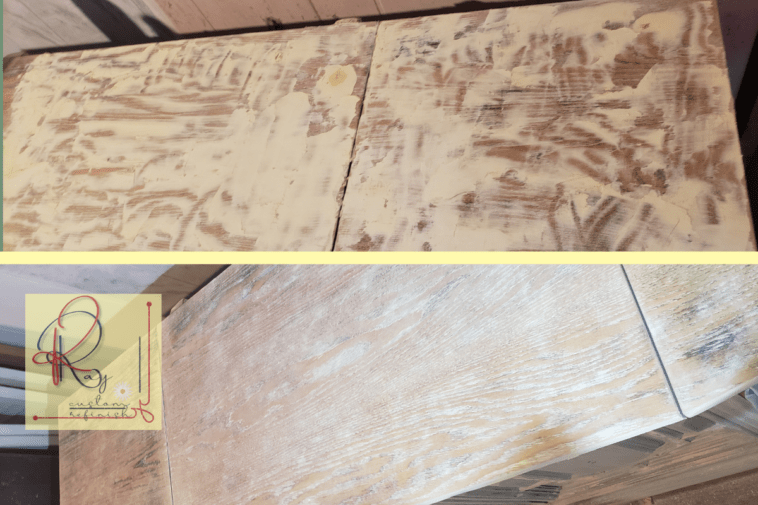
Once the putty had been sanded down, a coat of Water-Based Primer was applied. This also helps with filling the grain of the wood.
We chose Melange Paint’s “ONE” formula, which is an all-in-one paint that doesn’t require priming or a topcoat. I chose to prime it anyway because it was oak which is high in tannins. When in doubt, prime. It can only benefit the final result.
3 coats of Melange Paint and the piece was finally coming together.

Refinishing a Vintage Record Player Stereo Cabinet – The Interior
Like I said earlier, this piece was in close to perfect condition. Especially the interior. There was hardly a scratch on it!
The client said she just wanted it cleaned up and shined up a bit, but no color change. I tested the finish with denatured alcohol, and lacquer thinner to find out which clear coat was used originally, and discovered the original finish was lacquer.
If you ever need to figure out the original finish on a piece, check out my post on Repairing Scratched Clear Coats for all the info you’ll need!
Of course, I wrapped up all of the interior components as best I could before starting any work on it.
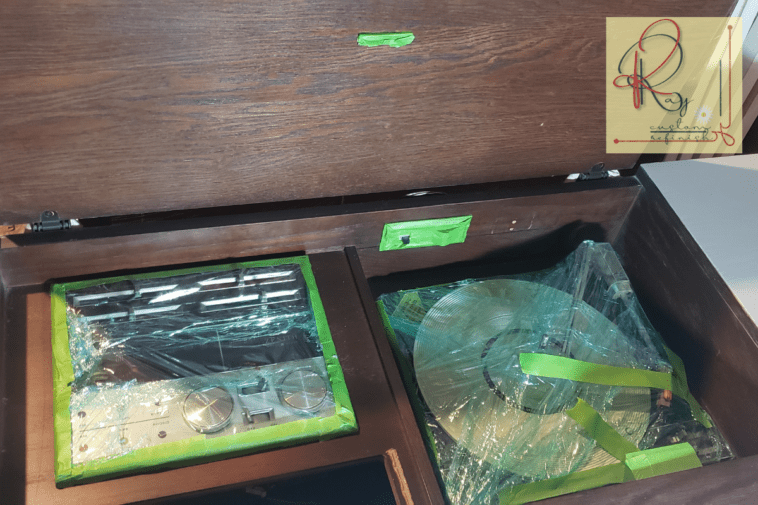
Using a tiny brush soaked in lacquer thinner, I lightly coated any scratches or imperfections. After 30 minutes I applied a thin coat of lacquer to the surface and left the area.
One more coat 2 hours later and it was good to go!
Refinishing a Vintage Record Player Stereo Cabinet – The Hardware
We were getting close! The final piece to the puzzle was the front hardware. Technically there is no need for the handles because the front doesn’t open! But without them didn’t work either.
The client was originally thinking black, which we quickly discovered did not work!
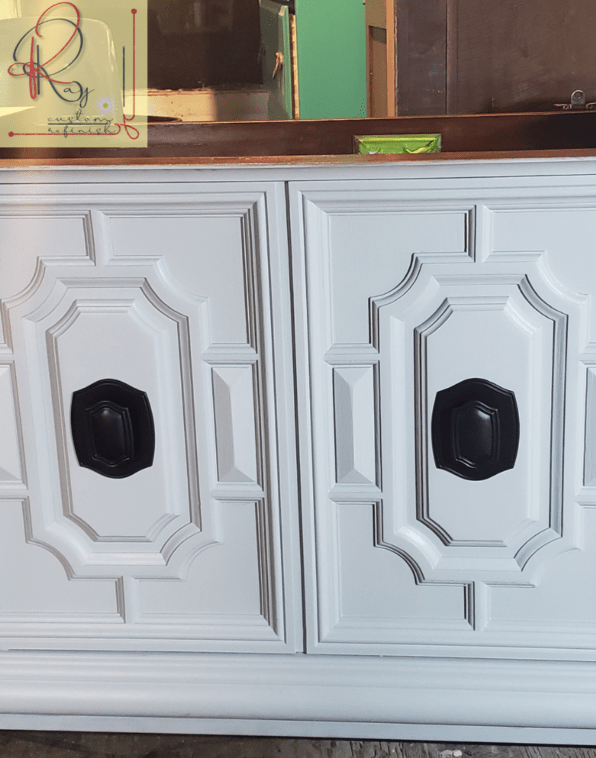
Neither of us was a huge fan of the hardware in general, so I went to work searching for something better.
Luckily, not even a week earlier, my other half brought home a couple of gorgeous antique brass knocker-type handles that were heading to the landfill after a cabinet replacement he’d done. They could not have been more perfect for this piece!
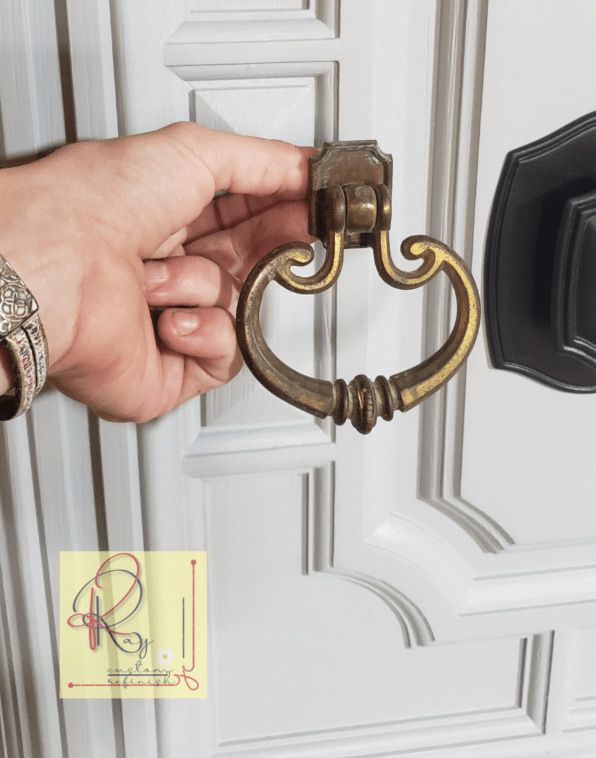
They were pretty dirty and tarnished, but easily cleaned up with my usual homemade mixture of vinegar, flour, and salt. Check out my Metal Furniture Refinishing post to learn the recipe!
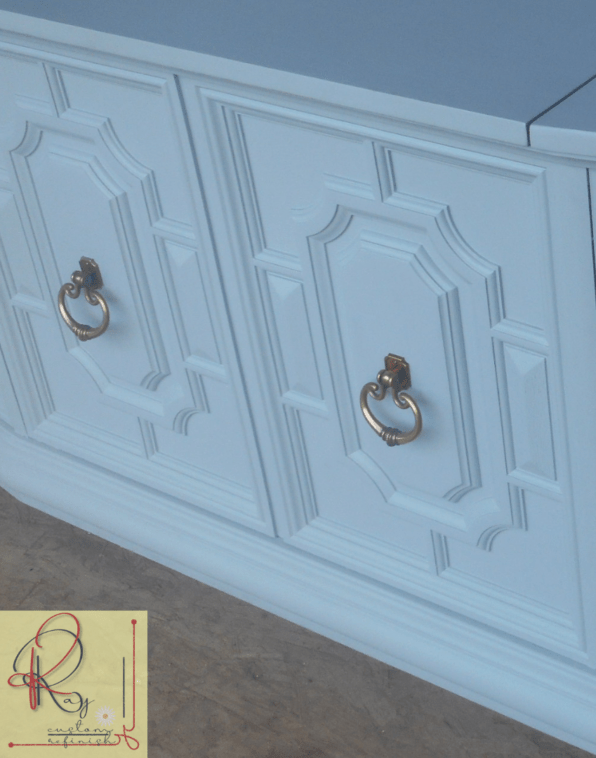
Refinished Vintage Record Player Stereo Cabinet – Final Reveal
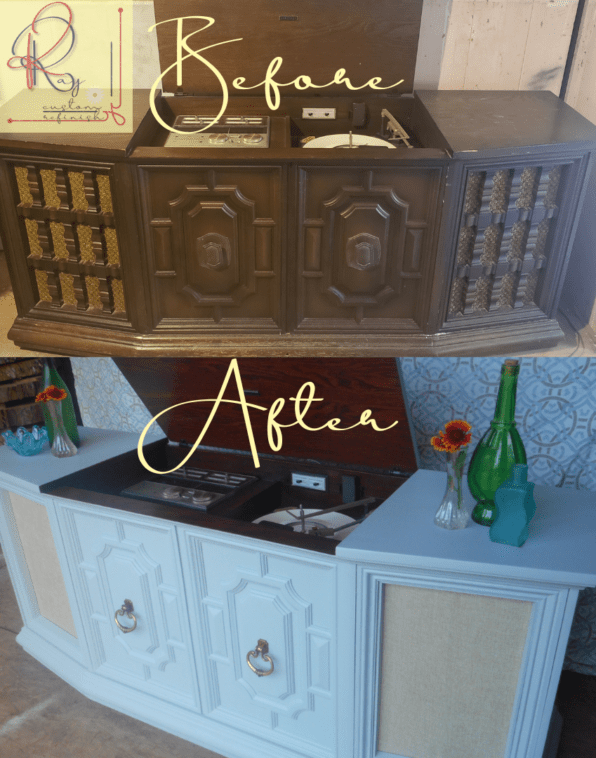
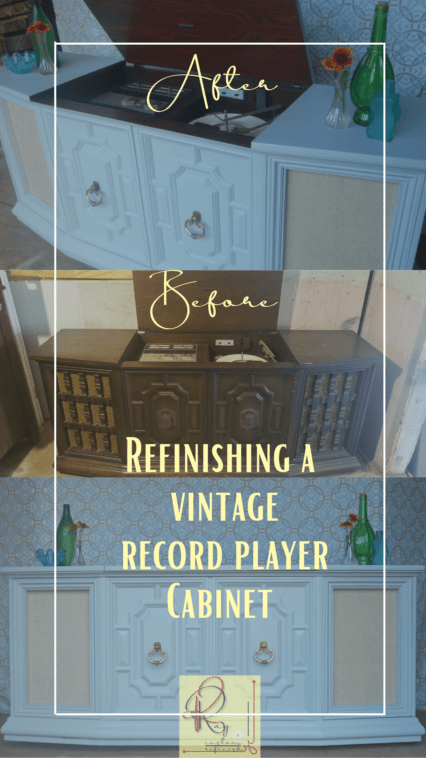
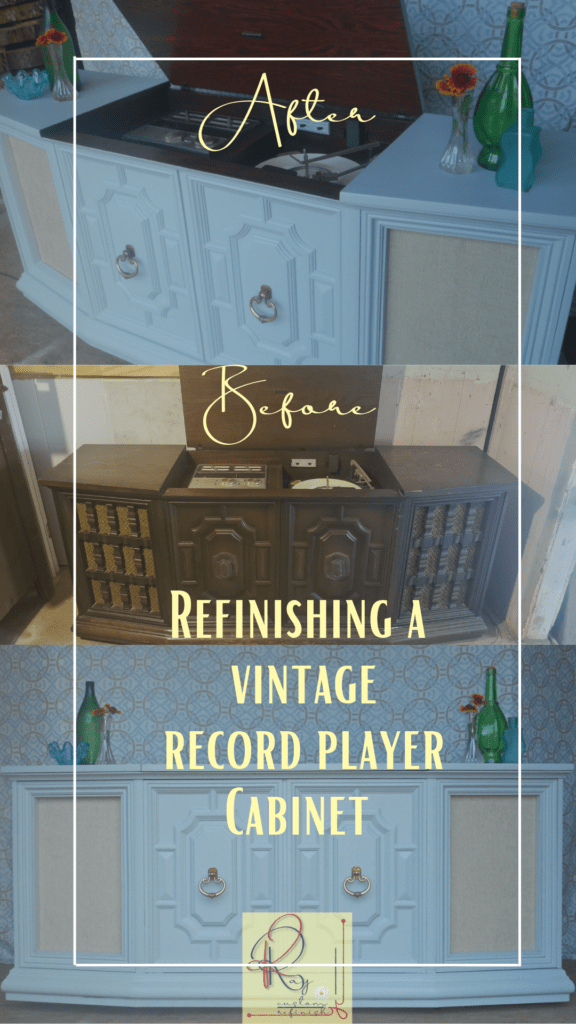
Thoughts? Overall, this may just be my favorite project yet. Check out my Sold Furniture Portfolio and let me know which one is your favorite!
Thanks for reading,
KRay



Hello! I recently just purchased an old RCA side table with a built in turntable/radio/audio controls from the 50s. I’m confident in refinishing the sidetable, but the radio is not working, needle is broken/needle stand is broken. Otherwise everything else works. How’d you go about repairing something like this or do you know someone who I could talk to that would know something about this?
Hi Conner, unfortunately the record player I refinished was working so I never had to inquire on repairs sorry. I know there’s lots of info on Youtube on repairing them, if that helps at all. Sorry I couldn’t be more help! Good luck!