**Heads up: This post contains affiliate links. As an Amazon Associate, I earn from qualifying purchases. Meaning I may receive a small commission– at no cost to you, of course– were you to make a purchase through any of the links. If I link to a product, I use it, I love it, and I think you would too! Please see my Privacy Policy for more details.
Part 2 of the Little Wooden Rocking Chair Series
Hello Again,
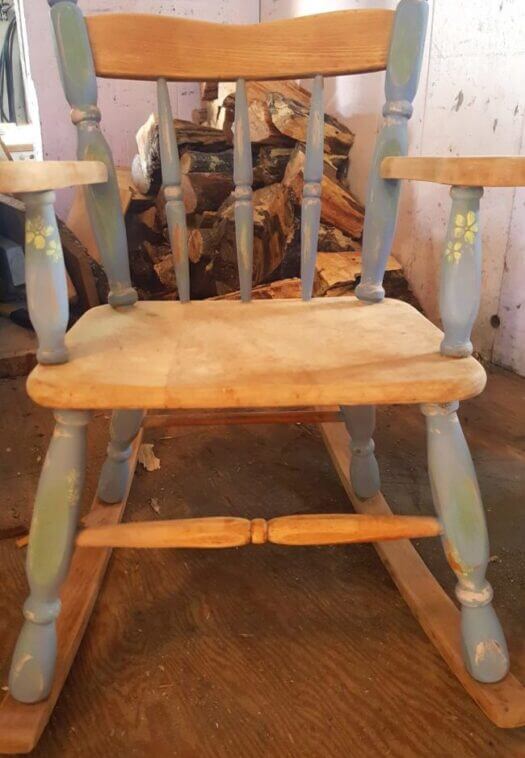
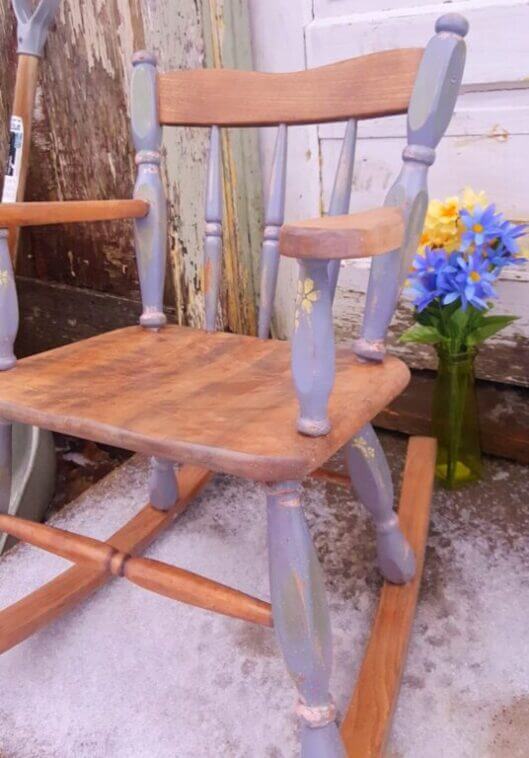
I have officially completed the little wooden rocking chair and I am in love! Today I will be explaining how by layering wood stains together on one piece, you can achieve a rustic look.
You can find Part 1 Layering Chalk Paint here. I followed the following paint steps for the bottom half and back of the chair.
Layering Chalk Paint for a Rustic Farmhouse Look Step by Step (with stencils)
- Strip & Sand your piece.
- Apply 1st coat of paint. Allow drying at least 2 hours.
- Apply a thin layer of petroleum jelly to spots you want this 1st color to show through.
- Wait 10-15 minutes, then apply the 2nd coat of different colored paint. Allow drying at least 2 hours.
- Apply stencils in one of the 3 colors or another separate color. After 2 hours, cover the stenciled area completely with petroleum jelly.
- Also, apply another thin layer of petroleum jelly to different spots you’d like this 2nd coat color to show through.
- Wait 10-15 minutes, then apply your final coat and 3rd paint color.
- Allow drying 24 hours.
- Using a fine-grit sanding sponge, lightly distress, the paint should come off easily in spots with petroleum jelly. If it does not come off on the stenciled area, try wetting a rag or your sanding sponge and applying light pressure to the area.
I think it came out adorable. Not too much craziness/overload like a lot of other children’s items I see so I’m definitely happy. My next step was to finish up sanding the wood and clean up any edges that paint ended upon. Check out 5 game-changing tips on sanding wood if you need help with that!
Before staining, be sure to clean the wood with Mineral Spirits, and use a Pre-Stain Treatment Method on the wood to ensure an even stain. I recently learned of using a Black Tea Treatment before staining which is my new #1 method. Learn more about that in my Preparing Wood For Staining Post.
On to Blending Wood Stains for a Rustic Look!
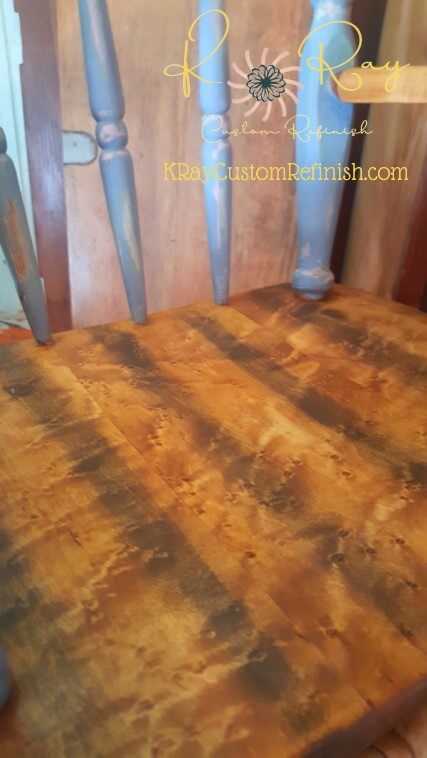
I didn’t have a strict plan for stains on this one. All I knew was I needed a light, dark, and a mid-tone to finish it all off. Starting with streaks of Minwax’s Natural Stain, and then adding a hint of Colonial Maple. The seat has an amazing texture that truly stood out through this whole process. (this is also where the chair looks its worst, so please be nice 🙂 )
S.T.A.I.N.S = Seriously Tiny Amounts In Neat Sections.
I started with the seat and arms first. You want to do it in sections as there is a lot involved, and you don’t want to let any of the stain dry without absorbing – if you end up with excess.
Use a lint-free rag, and only dip a tiny corner in for each type of stain.
Using the smallest amount possible, wipe it on with the grain. Try to make it so you honestly don’t need to wipe anything off of the wood at the end.
Just barely wet it, and then rub it slowly into the wood. I used one rag and it was so dry, that I used each corner for a different color of stain and it was no problem at all!

How To Blend Stains Together For a Rustic Look
Apply Stains 1 & 2
Minwax Natural in streaks, with a small amount of Colonial Maple stain on the edges toward where the dark stain will be applied.
Apply Stain 3
Dark Kona stain in the spaces between the natural/maple mix. On the arms, I did the dark stain on the edges and light on top – with the maple color in between the dark and light blending all the way through.
I completed the seat and arms without wiping down any excess until this point. Just use your best judgment, if it seems to be getting too dark then wipe off the excess at any point. From there you should let these 3 stains dry for about an hour before you do anything else.
My stains are the 1-hour dry time type so if using another stain wait the recommended amount of time.
Apply Weathered Gray stain over the entire section you’re working on.
Leave on for the longest amount of time possible before wiping. (Usually 15 minutes)
OPTION 1: White Ceiling Paint
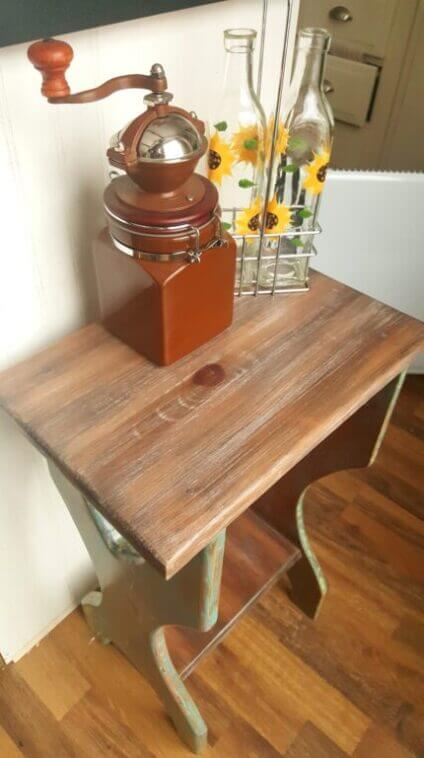
Put barely any paint on your brush. More than dry brushing less than normal painting. Then thinly apply the white ceiling paint in streaks. Using a large wire brush, drag it across the paint in light long strokes (almost as you would a paintbrush) to get the paint deep into the pores of the wood.
(Similar to image)
Option 2: Antique White Stain (Used on this rocking chair)
Finish the entire piece by staining it with the above steps. Once completely dried, lightly sand it all with 220 Grit Sandpaper, and then add the antique white to the whole piece at once.
Leave it for 15 minutes and lightly remove any excess.
This child’s rocking chairs’ maple seat, was not going to accept the first option’s process, I could tell. The marbley(sp?) looking wood was also too beautiful to completely cover up that way.
So instead, my incredible mind-reader boyfriend just happened to bring home an Antique White stain for me to use. My original thought was thinning some white paint with water and washing it, so I was ecstatic when he came home with that one!
It added just the perfect amount of blur to blend all of the lines together. Natural and beautiful, just what I was looking for!
THE Topcoat to use
For a topcoat, I used my new favorite, Zar Oil-Modified Polyurethane. It goes on incredibly easily and smooths out perfectly. Even if you’re OCD gets the best of you and you brush it just one too many times. (This is a serious problem for me.)
It dries in a beautiful matte satin finish and completes the country farmhouse look perfectly. What do you think?
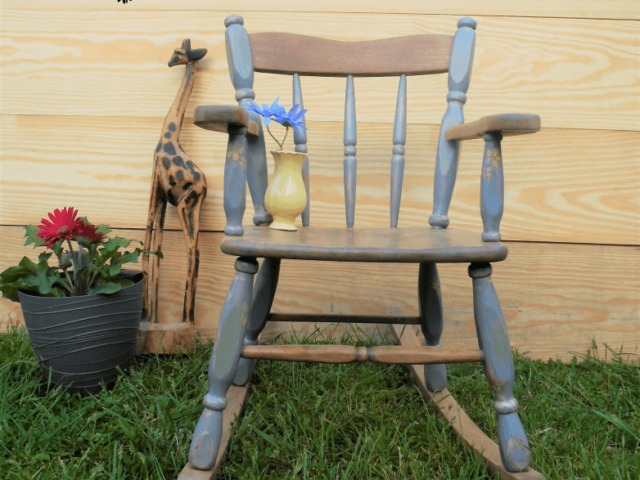
I love it and hope you all do too! It is still available in the shop please go check it out.
Check out part 1 how to layer chalk paint here if you missed it.
To learn more about staining perfectly: check out my post on Staining Wood Furniture where I try to answer every question you’ve ever had while staining wood!
If you were looking for a different distress technique I’ve easily explained 7 Paint Distressing Techniques to help!
For more tips, tutorials, product updates, and coupons sent to your inbox please join my mailing list 🙂

