**Heads up: This post contains affiliate links. As an Amazon Associate, I earn from qualifying purchases. Meaning I may receive a small commission– at no cost to you, of course– were you to make a purchase through any of the links. If I link to a product, I use it, I love it, and I think you would too! Please see my Privacy Policy for more details.**

After a few years in the Furniture Refinishing Business, I’ve learned one thing for sure:
Single, Wooden, Chairs, No Matter How Fun They Are, Just Don’t Sell.
I, for one, absolutely love interesting wooden chairs. Accent chairs, or “statement pieces” if you wish. To such an extent that I’ve accumulated quite a few random chairs over the years, none with even a close match to make a pair.
Want to Prove Me Wrong? Check Out My Refinished Chairs For Sale!
Understandably, most normal(?) people, usually look for at least a pair of chairs, or a chair/table set when they’re shopping for furniture.
In order to save some chairs from the dreaded Spring cleaning donation box, I had to think of another purpose for a few of my extras!
And so, since it’s almost Springtime (thank goodness), I had the thought for garden planters.
I absolutely love seeing old, rustic chairs in peoples’ gardens. Most are just chairs, but if the chair was a planter too?! Even better!
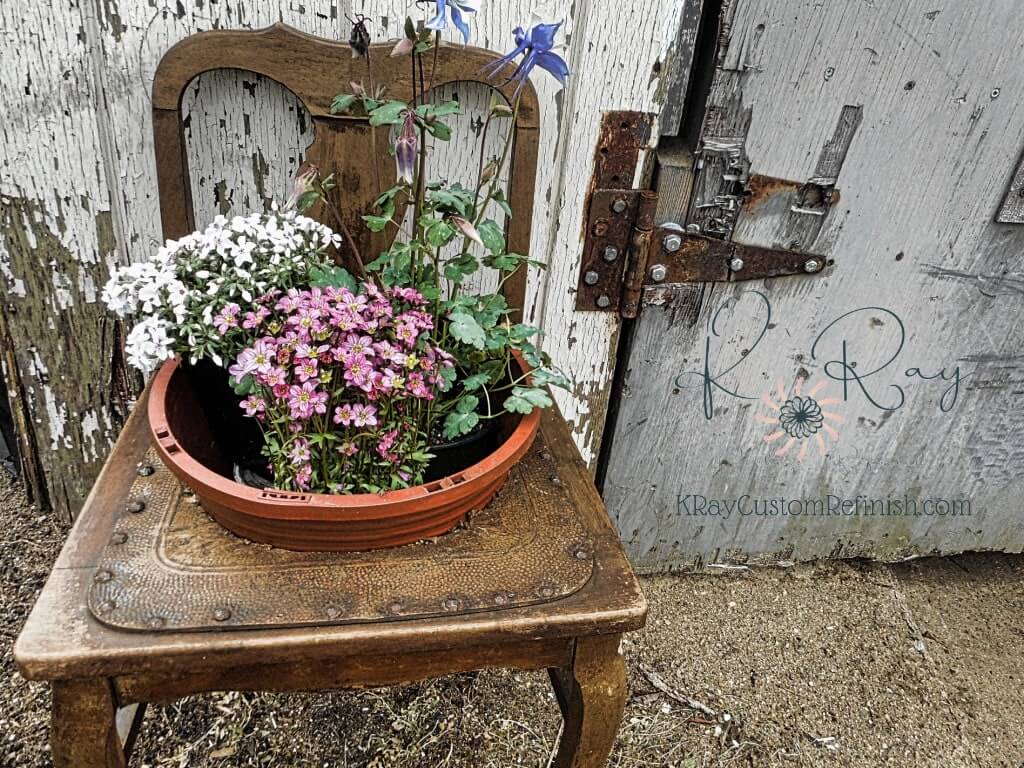
So I’ll be teaching you how to make a chair planter for your garden today! One chair, in particular, stood out to me as the perfect candidate for a chair planter.

It is definitely vintage; obvious by the gorgeous original nailhead trim holding the intricate leather seat on. The only reason I waited this long to finally transform it was due to its age.
But being transformed into a beautiful chair planter for my garden is a step up from dusty storage!
Most Wooden Chairs Would Work For Chair Planters If You Have The Right Tools.
The chair I chose to use for my planter already has a hole in the seat beneath the leather, but that isn’t a necessity.
I’m actually cutting a circle out of the leather, and some wood in order to keep some of the nailhead trim and leather on the piece.
I could just remove the nailheads and leather, and use a rectangle pot, but then it loses most of its rustic charm in my opinion.
You’re probably going to want to choose a wooden chair of some kind, but I’ve seen metal chair planters as well. Old dining chairs with easily removable seat cushions work wonderfully as well.

Pay close attention to the legs of the chair when making your choice. If you plan to use the hole from removing the entire seat, you’ll probably need to use a pot that’s on the larger side.
You’ll want to be sure that 1: the legs are sturdy and strong enough to hold a very large pot with soil, etc. and 2: there’s a crossbar at the right height to add extra stability.
As you can see in the photo above, the crossbar on my chair sits at the perfect height for the pot to set on, which will relieve some of the stress on the seat.
A Jigsaw Is The Best Choice For Cutting the Seat
Trace out the size of the circle, or shape you need cut, based on the pot you’re using.
Drill a couple of holes along the edge of the line, large enough to fit the jigsaw blade through to start cutting.


The Inner Edge of the Cutout Should Be Sealed Before Placing Your Pot, to Keep Moisture Out
Exterior Varnish works great on wood for outdoor furniture. Sand the rough edge lightly to get rid of any sharp edges, and then seal.
Trust me, I had to do some serious research to learn exactly what to use as an outdoor finish. It was harder than I thought to figure out! There’s not many 100% USE THIS articles. So of course, it comes down to preference I suppose.
Clear Varnish was definitely a front runner. As well as Thompson’s Water Seal. They actually have a spray-on stain now that seals and stains all in one! I did not use it for this project but I plan to check it out asap.
Finish Your Chair As You See Fit, Paint, Stain, or Nothing At All!
I enjoyed the rough look of my chair and left it basically as-is. Sealing it with an exterior varnish, and adding a bit of Dark Wax after it dried to bring out some of its features.

Related Post: The Best Tools & Supplies For Refinishing Furniture

If you want to use wax, be sure to seal the wood with varnish, polyurethane, or oil finish BEFORE waxing.
If the planter will be outside in the rain, you will have to reapply the wax periodically, as it will break down rather quickly outside.
Since We’ll Be Using a Separate Pot For the Plants, There’s No Need To Worry About Certain Sealers’ Toxicity to Plants
For other planters, be sure to avoid chemicals on areas that will come into direct contact with the plants or soil.
Next week I’ll be doing a tutorial on Custom Wooden Planter Boxes, and will go into more detail on certain finishes that are harmful to plants.
After the Sealants’ Required Dry Time, Insert Pot, Soil, and Flowers!

I love the way ours turned out! What do you think? Please feel free to share photos of your finished chair planters, I would love to see everyone’s!
Need help organizing all of your springtime projects??

Need Help Organizing All of Your DIY Projects? Head over to my DIY Resources Page, download the DIY Project Planner Pages, and get organized!

Tune in next week for my newest product release Custom Wood Planter Boxes, and soon to be released 2 Best of Lists for Refinishing Furniture!
Until Next Time,
KRay


What a fun way to use an old chair. I love re-using things and bringing beauty back to them. What a great piece.
Thank you so much!