**Heads up: This post contains affiliate links. As an Amazon Associate, I earn from qualifying purchases. Meaning I may receive a small commission– at no cost to you, of course– were you to make a purchase through any of the links. If I link to a product, I use it, I love it, and I think you would too! Please see my Privacy Policy for more details.**
Good Morning Everyone! Thanks for stopping into the KRay Custom Refinish Blog. Today I’m talking about the many different furniture paint distressing techniques. How to do each, and when to do each.
There are about a bajillion different ways to distress painted wood furniture I’m sure, but I will be discussing the 7 most popular techniques.
All Furniture Paint Distressing Techniques Create Different Looks and Styles
More often than not, your choice of method will be based on the materials you have on hand, how much time you have to spend on your project, and most definitely which look you’re going for.
Levels of distress range from “just a few smudges or scratches” to “almost chipped off to nothing”.
I usually stick right around the middle of the two. The rustic farmhouse look. But it’s always fun to try all of these methods out.
You Most Often Will Be Using Either Chalk or Milk Paint for Distressing Furniture
Painting furniture is just easier with chalk paint or milk paint, plain and simple. Other paints work, but they just don’t stick as well!
So you’re looking at a much more time-consuming project with latex or other paints. I for one always strip and sand furniture before painting, so the no sanding “benefit” for chalk paint doesn’t really mean much to me.
But, if you’ve never tried chalk paint, it’s definitely worth giving it a shot- sanding, or not.
Luckily, I’ve made a list of The Best Cheap Paints For Refinishing Furniture. Including Chalk Paint and Milk Paints!
For my demonstration photos, I am using FolkArt Chalk Paint and Rustoleum Milk Paint.
The Furniture Paint Distressing Techniques I Will Be Covering Today Are:
- Wet Distress
- Dry Distress
- Chippy Distress
- Layered Paint Distress
- Original Paint Distress
- Dry Brush Distress
- Dark Wax Distress
#1 Furniture Paint Distressing Technique: Wet Distress
A “No Mess” Method Most People Prefer
Including me! The wet distress method is probably my most used method. It’s just such an easy one with zero mess.
You want to paint your piece normally and wait for it to ALMOST dry. I usually wait about 20 minutes or so.
Then take either a wet paper towel or sponge, and lightly rub the areas you want the paint to come off.

Using a Wet/Dry Contour Sanding Block Makes the Process Go A Lot Smoother
My favorite wet/dry sponge is these thin Contour Sanding Block on Amazon:

It works wonders! It’s bendable and has one side more sponge-like and one side with 220 grit sanding block.
You can rinse it and reuse it over and over. Highly recommend it for wet distressing.
#2 Furniture Paint Distressing Technique: Dry Distress
Essentially Sandpaper on Dry Paint
Wait for the paint to completely dry for this one. I usually wait for at least 24 hours. The wet/dry sanding block works perfectly for this technique also.
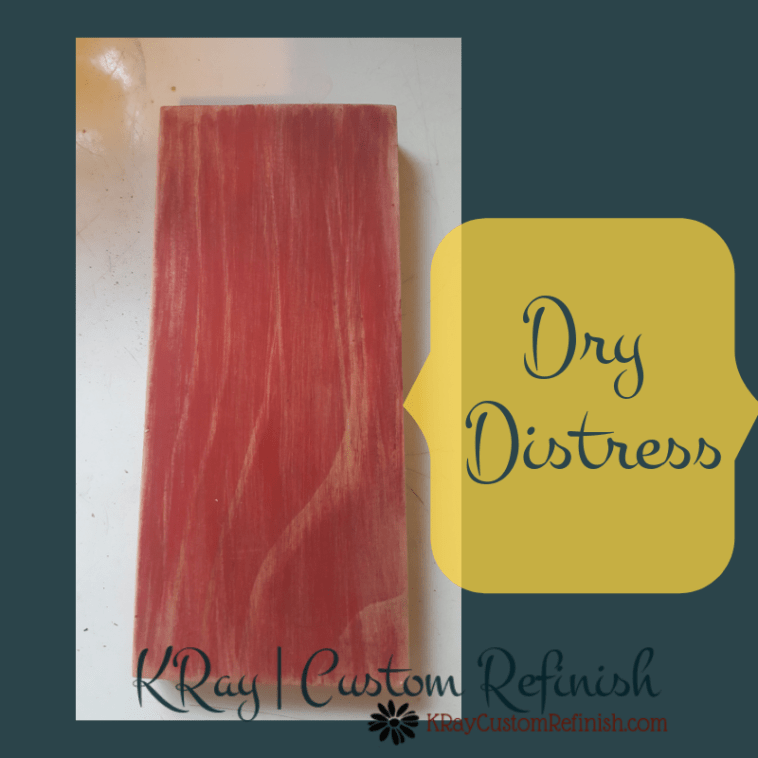
Using a Fine Sandpaper Block Helps With Removing Too Much Paint
Just don’t wet it. Rub the areas that would normally be worn down from usual wear and tear. Then wipe down the entire piece with a clean cloth, or if you have a compressor as we do, (the best) just blow all the dust off.
Having trouble keeping all of your projects organized? Download my Printable Project Planner Pages and never lose track of your projects again!

#3 Furniture Paint Distressing Technique: Chippy Distress
Works Best With Milk Paint, (What It’s Famous For)
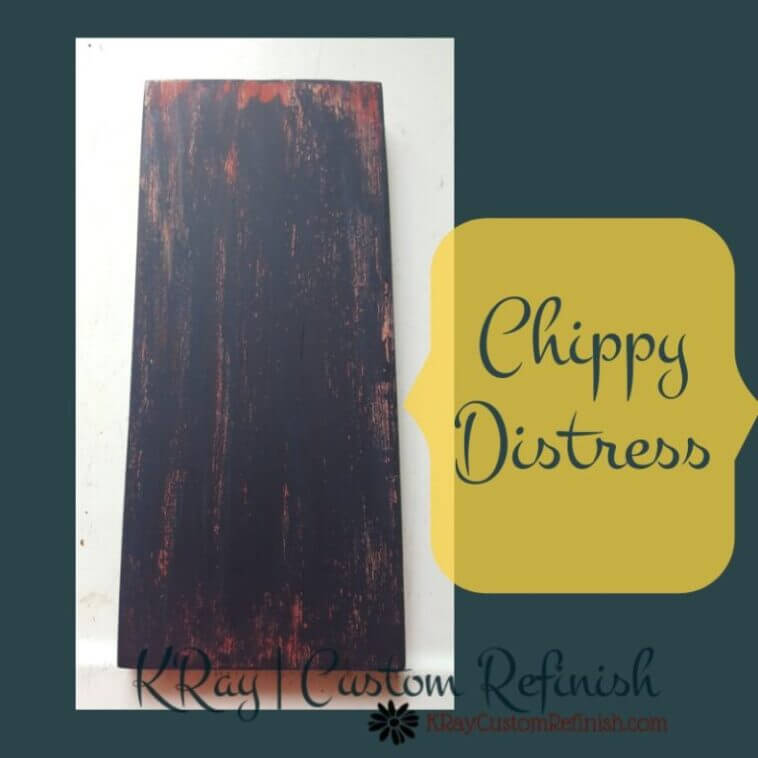
If you’ve never used Milk Paint before, it likes to chip off on its own after it dries. It is meant for a rustic farmhouse-style paint job.
You can apply a deter, such as vaseline or wax, when applying it to assure the paint chips off. Apply that to the spots you’d like the paint to chip away before your first coat of paint.
Another way to make the paint bubble and chip is to hold a blow dryer or heat gun on the paint while it is drying. Once the paint is dry, you should be able to use just a scraper or putty knife and gently rub against the paint to get it to fall off a bit more.
Try Taking a Piece of Packing Tape to the Paint if it isn’t Chipping How You’d Hoped
If all of those steps don’t work (milk paint does have a mind of its own sometimes) you can pull out the tape.
Stick it to the spot you want the paint to come off, and pull it off quickly like a band-aid! You may need to do this multiple times depending on the milk paint you are using.
But normally you won’t need to use half of these steps with milk paint.
#4 Furniture Paint Distressing Technique: Layered Paint Distress
Multiple Layers of Different Colored Paints
Layering paint is one of my favorite paint-distressing techniques. You can choose multiple colors (the funner the better) and truly make something unique.
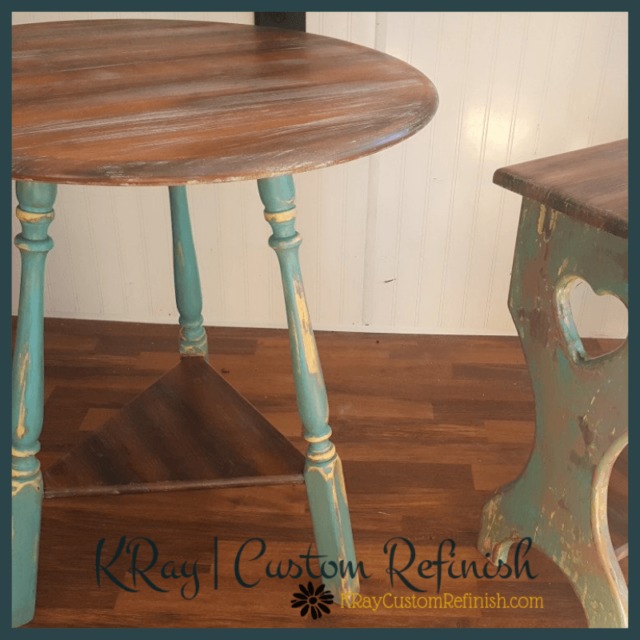
After you apply the first coat of paint and let it dry, you will want to apply a thin layer of Petroleum Jelly to the spots you’d like to show through.
Wait at least 15 minutes before applying your next (different-colored) coat.
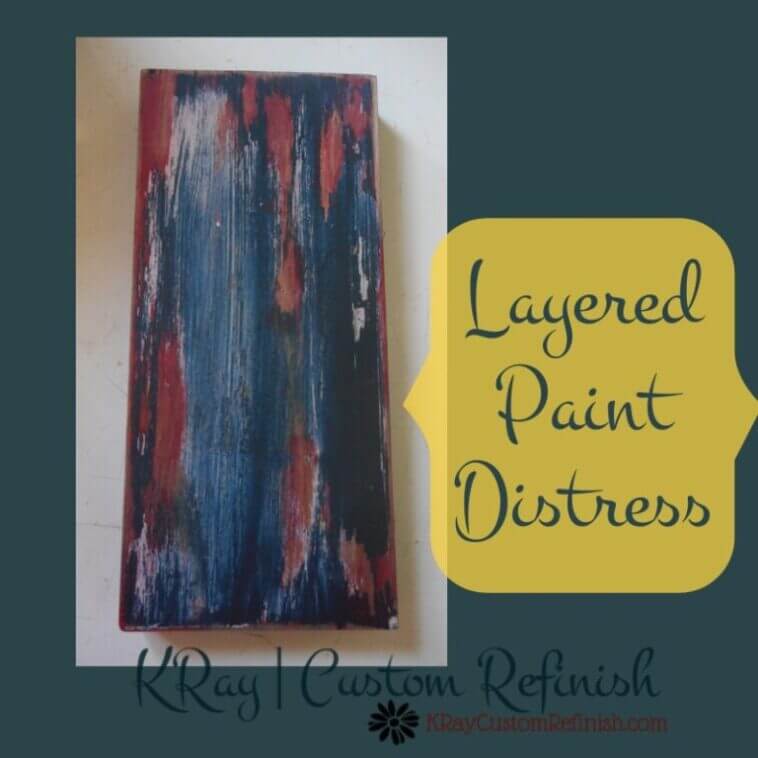
Again, wait for that coat to dry and apply a 2nd coat of Petroleum Jelly to different spots you’d like that 2nd color to show through. Finally, add your 3rd coat, again a different color (if you’d like).
I normally stick to 3 colors with this paint-distressing technique. But I’m sure you could do more.
Just be careful, you don’t want the piece to be too overloaded with paint.
You can read more on this technique in my Layering Chalk Paint For A Rustic Farmhouse Look post. I also added stencils in my layering, bringing my colors to 4.
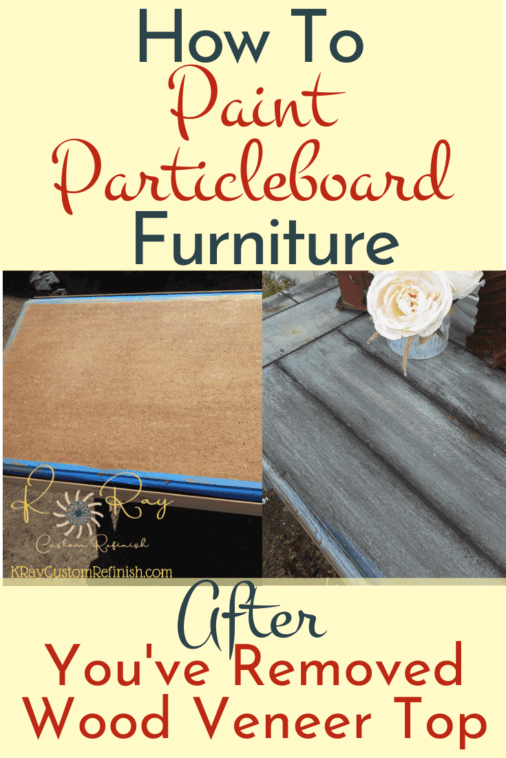
The layered paint distress also works great for disguising particleboard furniture. I created a faux barn door on the top of a coffee table recently with this technique. I learned that the top was particleboard after removing the wood veneer covering it! (Oops!)
But instead of giving up, I knew that layering multiple coats of paint may have just been enough to hide the particleboard. What do you think??
#5 Furniture Paint Distressing Technique: Original Paint Distress
Using an Antique Painted Piece, Distress What’s There And Seal It In
You don’t even necessarily have to distress the paint that’s originally there. A little cleanup may be all it needs.
If it’s an older piece, the paint may already be chipping away.
Just be sure to test the paint for lead before doing any sanding to it.
My Rustic Red Farmhouse Chair was done using this method.
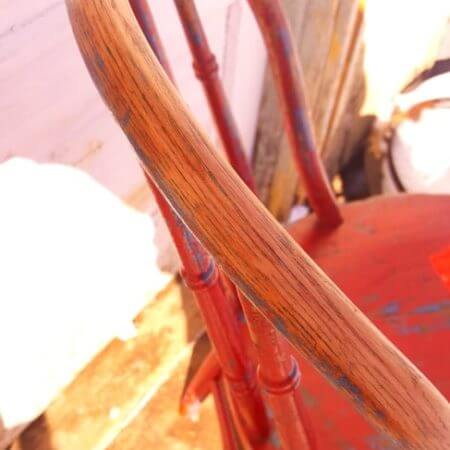
The paint was slightly chipping away in spots, enough to show the gorgeous blue paint it had originally been before the red.
I strategically sanded it a bit more and then sealed the chipping paint with multiple layers of Polyurethane.
You can also try using a wet distress type method. Although the paint is very dry, older paint is easier to remove with a little water.
When you’re using this method, you want to apply the topcoat thick, to seal in all the chips and make sure it doesn’t continue chipping.
Do not sand in between coats when applying the Polyurethane no matter what the can says!
It’s rare for a piece to be in the right condition for this one, but when it is it’s so fun to do! There’s nothing like the charm of an actual rustic piece with a story 🙂
Looking for a more clean finish? Check out my post on Painting Wood Furniture Pure White.
#6 Furniture Paint Distressing Technique: Dry Brush Distress
Lightly Painting Over the Base Coat with an Almost Dry Paintbrush
The dry brush paint distressing technique takes a little practice to master. Try practicing on boards or scrap before applying it to your piece.

Chip brushes and bristle brushes work best for this.
And you want it to be dry. I wipe mine on a paper towel after lightly dipping it in the paint. You can always add more paint if it’s not what you want but obviously can’t take it off.
Keep a damp cloth and a spray bottle nearby also, to touch it up as you go.
I used the dry brush paint distressing technique on my Farmhouse Wall Cabinet below. It added the perfect touch of age and distress to the piece.
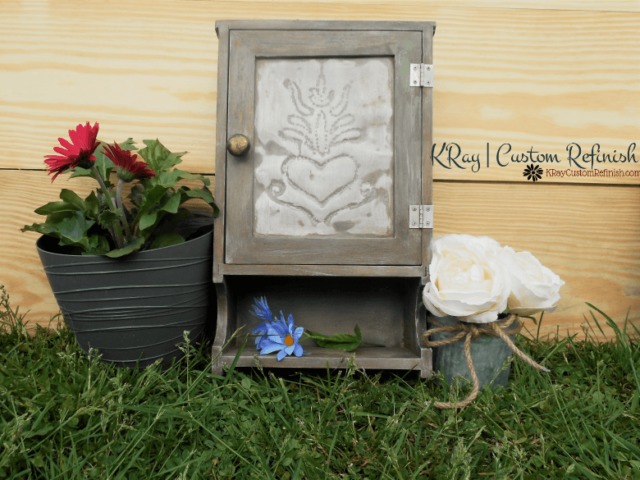
The farmhouse look is perfect for dry brush paint distressing.
Run the paintbrush in long strokes up and down the piece until you achieve the look you’re going for.
It takes a bit to get it right. I know I, for one, could never get it to look random enough, but being a bit of a perfectionist, it was tough for me to let little imperfect spots go. But, just keep at it, and eventually, it will come together.
#7 Furniture Paint Distressing Technique: Dark Wax Distress
Applying Dark or Antique Wax to the edges of the piece and areas you want to stand out
Before applying the dark wax, you should apply a coat of clear wax to the entire piece. Then come in with the dark wax on the edges and spots you’d like to stand out.

Apply a small amount, and then immediately wipe it off with a clean cloth.
If you don’t apply clear wax first, the dark wax will absorb very quickly and be difficult to remove from the wood.
Another option would be to make an antique wax glaze by mixing it with mineral spirits. You can read more on how to apply an antique wax glaze in my Antique Wax Chalk Paint Tutorial.
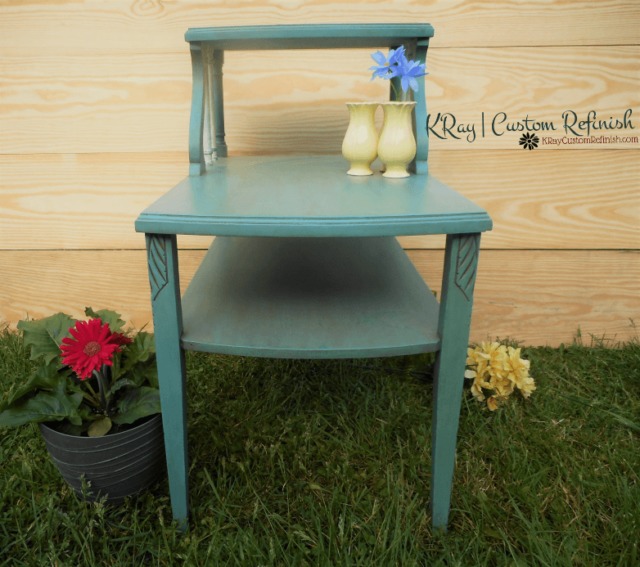
The mid-century two-tier side table I completed in that tutorial came out gorgeous with dark wax glaze.
Both options work great for aging and distressing a piece of furniture. You do need to add wax to the piece multiple times as it wears off over time, so just keep that in mind when you choose the distressing technique that’s right for you!
Which do you think that will be? As I said the wet distress and layered paint distress are probably my go-to paint distressing techniques.
You can check out my latest layered paint piece here: Navy Blue Coffee Table with Natural Wood Top.
Do you have a favorite? Am I missing any methods I should know? If so I would LOVE to hear about it!
If you enjoyed this post please feel free to share, and I’d be happy to send you updates like this weekly if you subscribe to my newsletter!
Next week I’ll be diving into distressing techniques for wood with a little less emphasis on the paint part. You’d be surprised how many options there are for just distressing the wood itself without paint!
Be sure to check back in for that one!
KRay


I am so grateful to find your post, I have a piece at home that I will transform this weekend. Thanks for sharing.
You’re very welcome! I’d love to see how it turns out 🙂 Good luck!