**Heads up: This post contains affiliate links. As an Amazon Associate, I earn from qualifying purchases. Meaning I may receive a small commission– at no cost to you, of course– were you to make a purchase through any of the links. If I link to a product, I use it, I love it, and I think you would too! Please see my Privacy Policy for more details.**
Hi everyone! Have any of you noticed all of the Raw Wood Furniture everywhere lately? I am so in love with this new trend and wanted so badly to try it on this beautiful Pedestal Writing Desk commission.
But as it turns out, this desk almost made me give up on furniture refinishing. Okay, okay, it didn’t go that far. But boy, did this thing test me!
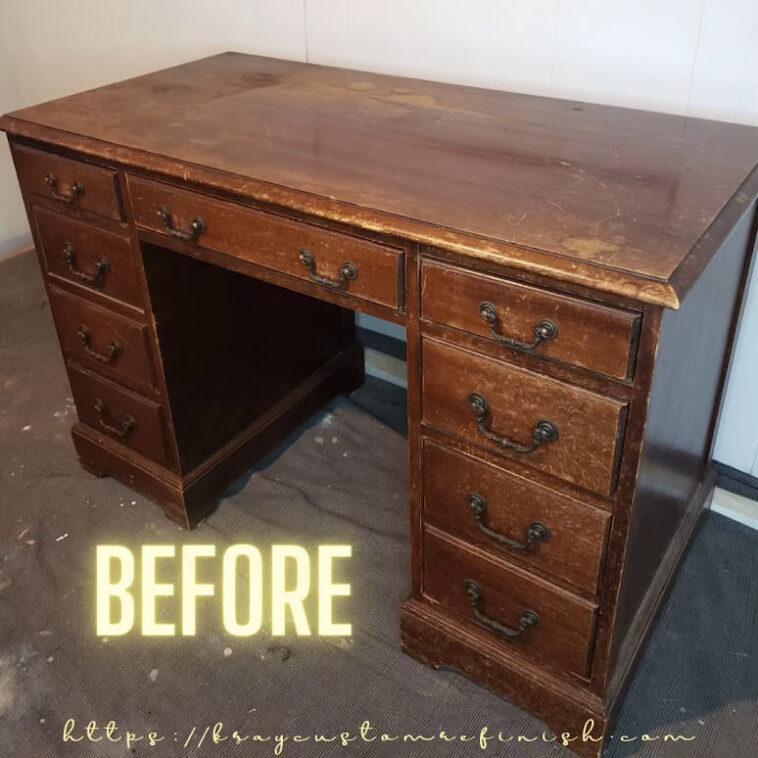
It’s a pretty standard desk from the 1980s. I’m sure 90% of you have seen/owned something similar before.

The owner of the piece wasn’t too particular on color or finish, as long as it was no darker than the original. Perf! I’d been dying to try Dixie Belle Paint’s “Au Naturel” Gel Stain on a piece for the ever so popular “Raw Wood Finish”. Here was my chance!
I stripped and sanded a single drawer front and stained it “Au Naturel” for the client to approve in person to avoid any issues later.

Now “Au Naturel” is a stellar gel stain. But like other stains, it appears differently depending on what type of wood you use it on.
Once I stripped the desk down, I saw that multiple types of wood were used in its construction.
The raised area of the top and drawers was a darker Mahogany veneer, as were the 3 sides of each pedestal. These were framed in Poplar and Pinewoods which are much lighter.
I also discovered some pretty deep scratches on the pedestal sides and some sanded-through areas.
Despite this, I went to work sanding and staining everything as is, –filling what I could–hoping it would all blend well. It didn’t.
I fought with this desk for a few weeks trying to get it to work using acrylic washes, oil-based stains, wood fillers, you name it. Then I finally called it.
Considering that the natural wood grain on this piece was almost non-existent anyway, painting it seemed like the next move. Maybe I could paint it to look like an authentic raw wood?
It took me a while to get to this point because this meant priming the entire desk and there’s no coming back from that. I wanted to get some of the natural wood grain to show through so badly but it just wasn’t happening.
‘So,’ I thought, ‘if I’m going to do this, it has to look authentic.’ Wood-graining tools are wonderful. But if you add too much grain, or grain where it shouldn’t be, it just doesn’t look like real wood.
That meant it was time for some testing out paint colors and serious practice with my wood-graining tools.
Practice, Practice, Practice.
As with any other paint technique, the key to getting a faux raw wood finish that looks authentic is practice. You can’t ever practice too much!
Find some scrap wood, cardboard, anything, and just go to town practicing the motions necessary to create the right look.
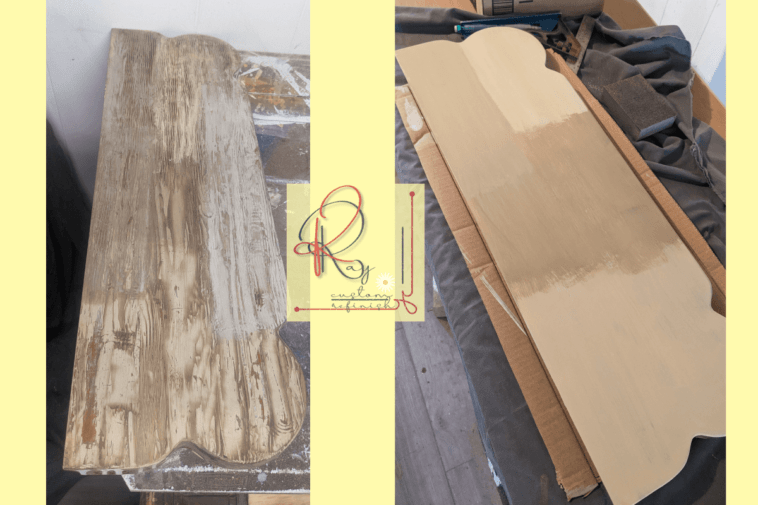
I luckily had 4 leftover panels from a drop-leaf coffee table that were the perfect length for this. You want something with a little bit of length to learn the up-down-up-down motion I’ll explain to you next.
I wasn’t positive about the color combo at this point either. So I took the opportunity to try several different shades for the base coat as well as the darker glaze coat.

Before I go on, let me give you a short step-by-step explanation of the process for Creating a Faux Raw Wood Finish with paint.
1 – Prep your piece
2 – Prime your piece
3 – Apply Light Color as Base Coat
4 – Mix Darker Paint Color with Glazing Medium
5 – Apply Dark Glaze Coat
6 – Immediately Use the Wood-Graining Tool to Remove Some of the Glaze
7 – Once You Get The Look You Like, Allow it To Dry
8 – Seal The Entire Piece
Mastering the Wood Graining Tool
The short video below shows some of my practice with the tool. This was the first time I tried using the tool, so the finished product isn’t perfect. But I thought it would help show you what to do, and what NOT to do!
As I said above, you want to paint your glaze over the entire dry, painted surface. You want it kind of thick to start.
Then holding your wood graining tool in your dominant hand, start at the top with the bottom (or top) edge of the tool on the surface. Slowly drag the tool down in a straight line while rocking the tool back and forth at the same time.
This took some getting used to for me. I like to start on the bottom edge of the tool and roll it upward while sliding down, but you can do the exact opposite as well.
Luckily, glaze is super forgiving so if you don’t get it the first time, flatten it all out with your paintbrush and try again!
My wood graining tool kit came with a triangular-shaped piece with different zig-zag designs on each edge. I found that it worked great to run over the surface lightly at the very end to give it even more authenticity.
The Best Color Combo to Use For a Faux Raw Wood Finish
Now remember, this is for a Faux RAW wood finish. If you’ve read my post The Ultimate Guide To Identifying Wood Types In Furniture you know that there are infinite wood types/colors possible if you’re going for just a faux wood grain finish.
But if you’re going for raw wood grain, your best bet is to choose a light beige or tan color for the base and a medium brown color for the grain.

As you can see by the image above, this still leaves plenty of options to choose from. Test a few of them and find what works best for you and your piece.
Keep in mind that for the darker wood grain, you’ll be mixing your darker paint color with a glaze, which lightens the color slightly.
A Few Things to Remember When Going For a Faux Raw Wood Finish
- Using the wide attachment for larger surfaces like tabletops makes it look more authentic.
- Rocking the tool VERY slowly will also help. If you overdo the grain or the grain is too small, it will not look genuine.
- If the darker grain stands out too much, try doing a wash using your base color & water 1:1 once the glaze has dried.
- Layering a few different colored grains sometimes helps as well.
And I think that’s it!
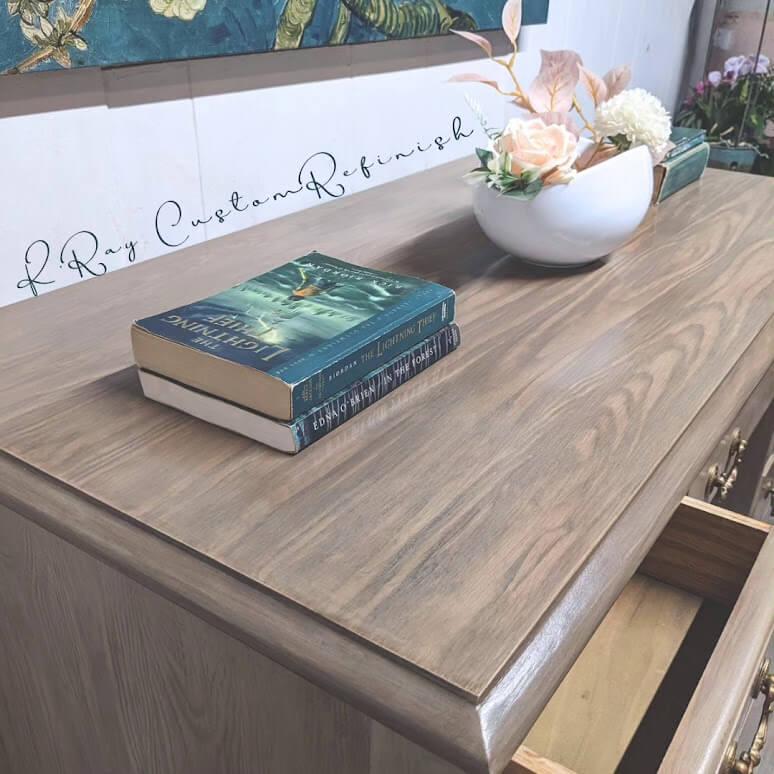
Here is my finished faux raw wood desk:


What do you think? Have you tried a faux raw wood finish on a piece before? How did you do it? I would love to hear about it in the comments below!
Pin this post for later!

Until Next Time,
Kay Ray


