**Heads up: This post contains affiliate links. As an Amazon Associate, I earn from qualifying purchases. Meaning I may receive a small commission– at no cost to you, of course– were you to make a purchase through any of the links. If I link to a product, I use it, I love it, and I think you would too! Please see my Privacy Policy for more details.**
In the furniture refinishing world, decoupage is becoming a seriously popular technique, which we all love! Up until now, I had yet to finish a piece using decoupage, so I figured it was time for me to join in on the fun! Of course, I decided to put a little “twist” on my first piece. So today I will show you how to decoupage glass and wood!
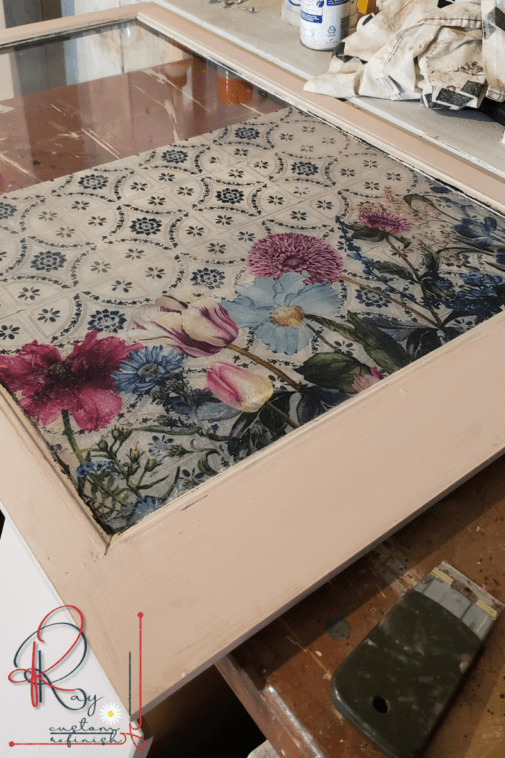
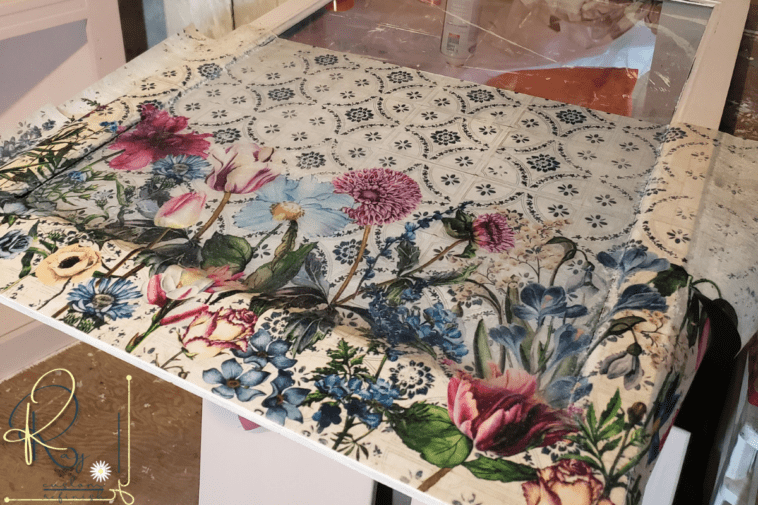
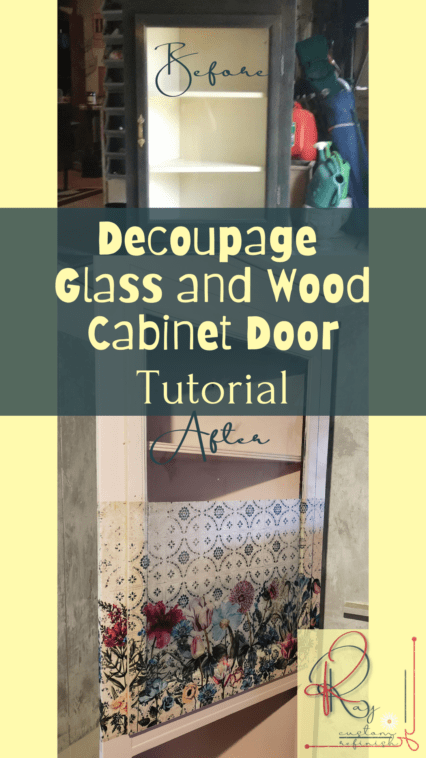
I’ll be decoupaging continuously across the glass cabinet door and frame, as well as a small area on the actual cabinet.
You’ve probably seen pieces with the inside of cabinet walls, the sides of drawers, or across the front of wood drawers. But most of the time when a piece has glass, either the inner glass is decoupaged, or the walls behind the glass.
This is lovely, of course, but I thought it might be cool to go straight across the door; glass, wood, and the outer edges of the piece as well. Hopefully creating an interesting privacy glass-ish look, that doesn’t completely block off the inside of the cabinet from view.
Of course, when I decided to take on this task, the number 1 question I had to ask was:
Can you decoupage glass?
The answer to that is, of course, yes! But in my research, all I was finding was decoupage projects on curved glass such as plates, jars, bowls, etc. I was interested in decoupaging flat glass.
Which, yes, you can decoupage flat glass. You just have to be a bit more careful not to cause things like brush marks, swirls, and bubbles, when working with flat glass. Another issue is the best product to use for adhesion to the glass.
What should you use as an adhesive for decoupage on glass?
Mod Podge is of course everyone’s first thought when it comes to decoupage. For sealing the decoupage paper after 100%, but for actual adhesion to the glass, you want to use glue. Nothing too crazy, but an actual glue– NOT an acrylic sealer. This is the glue I used on my 2nd attempt (since the glass broke the first time):
I thinned it slightly with water just to make it easier to spread. Don’t worry, it dries perfectly clear so you won’t have any pesky streaks popping up on the other side once it’s dry.
Again, DON’T use polyacrylic sealer alone to adhere the paper or fabric to the glass.
This is the one thing I learned from breaking the glass the first time around. Silver lining I guess? After the glass cracked I thought I was screwed. But I used Minwax Polyacrylic to attach it to the glass, and guess what! It literally just peeled off of the glass with zero effort.
So it definitely doesn’t work the greatest for flat glass at least. Sealing the decoupage paper afterward, absolutely. But stick with glue for adhesion to the glass.
How To Decoupage a Glass and Wood Cabinet Door Step-by-Step
This is the corner cabinet that I’ll be decoupaging:

I’ll be decoupaging from one side to the other, including the small side panels that are not a part of the door, so there will be some cutting and finagling needed to line everything up just right.
The gorgeous Re-design with Prima Decoupage Tissue Paper is 19″ x 30″ but it is separated into 2 separate sheets.
Step 1: Cut the Decoupage Paper To Size
Because this application is a bit tricky, I chose to basically attach the paper to the glass door with these amazing clamps I love so much:
You will need to measure your surface and align everything up properly. Once you’ve got the paper in the right spot, attach a clamp, and rest assured your paper won’t move from its spot under these clamps’ grip.
The Redesign with Prima Tissue Paper isn’t really paper. It’s more of a fabric than anything else. It is thick– but not too thick– and has a fabric-like texture. You can use a razor knife to make your cuts or sharp scissors. It doesn’t cut super easily so just be sure to work slowly and carefully as you go through the cuts.
The video below shows my process of cutting the decoupage paper to size for the wood frame, trim, and glass.
You may have noticed that I left the paper a bit looser than needed. I made a point to press the paper into the spaces where the molding meets the glass before clamping the opposite side.
Do this on each side if you’re working on something similar to this. Otherwise, you’ll end up with either, two sides that are too short, or you’ll be unable to cover the trim pieces completely.
Then when you go to cut the fabric, (or paper), make sure that you push the fabric against the trim and into that space before you cut it, and try to keep it there as you cut.
Depending on your piece, you may be able to place your clamp directly on the molding to hold the fabric in place and ensure you leave enough fabric to cover the entire area.
Step 2: Clean & Prep the Glass
This really is more important than anything when it comes to glass. Oils and dirt from your hands, dust, etc., will prevent your adhesive from properly adhering to the glass.
Immediately before you plan to apply the decoupage paper you need to clean the glass thoroughly. Begin with soapy water and a soft cloth. Once dry, wipe the glass down with rubbing alcohol or acetone using cotton balls. You can also use alcohol wipes to wipe down the surface.
Once you’ve wiped the surface down thoroughly, try your best not to touch it with your bare skin or fingertips. Oils from your skin are the worst culprit when it comes to contaminating your prepped surface.
Let the alcohol completely dry before applying anything else to the glass.
Need Help Prepping the Wood? Check out my posts on Furniture Prep!

I used Fusion Mineral Paint’s Rose Water Paint I purchased from Beautifully Reimagined’s site which I highly recommend!
Step 3: Apply Thinned Glue to the back of the Decoupage Paper
As I mentioned earlier, you’ll want to thin your glue with some water to make it easier to apply. Not a lot, a 1:4 ratio of water to glue should work.
Once thinned, soak a foam brush liberally in the glue and spread it over the back of your decoupage paper or fabric. If you’re using something that will soak up the glue on both sides then do this on the actual glass.
The Redesign Decoupage Paper is thick so it doesn’t soak through quick enough to matter. Cover the entire back as evenly as possible, then flip it over onto the glass in position.
Smooth it out with a squeegee or a (carefully) putty knife.
Step 4: Apply Sealer over the top of the Decoupage Paper
Here you can use Mod Podge or any Polyacrylic Sealer. I used Minwax Polycrylic Sealer because I had it on hand. You can use a foam brush or a regular paintbrush to apply.
Make sure you soak the paper completely. You will see a color change once the paper has been coated properly. As the other side of the glass will be visible inside the cabinet, try not to brush back over any of the poly once applied.
Check out my post, Applying Polyurethane Perfectly, For More Tips on Water-Based Polyacrylic Application
Let that dry for 24 hours, and coat again if necessary.

Now you may choose to stop here– I almost did too! I thought it looked lovely just with this! But I had a plan and I stuck with it. So I decoupaged the wood frame of the cabinet door also.
Decoupage on Wood Cabinet Door Frame
The steps for adding decoupage to glass can be followed for wood as well, but you can skip the glue. All that’s needed to adhere the decoupage paper to the wood is your polyacrylic sealer or Mod Podge.
Apply the sealer to the wood, then apply the decoupage paper. Finally, fully coat the outside of the decoupage paper as well with the sealer as we did with the glass. Let that dry for 24 hours, and recoat if necessary.

I chose to let the decoupage paper for the wood frame overhang when I applied it to the frame. I planned to continue the pattern onto the sides of the base as well, so I wanted to be sure everything lined up perfectly.

This way, I could hold the door in place, line up and clamp the excess where it should be before cutting it. I sealed the sides with Minwax Polyacrylic as well and trimmed the excess on the edges.

It’s not a must that you do it this way if you’re working on a similar piece, I’m sure it didn’t make that much of a difference but it gave me peace of mind at least.
I think it gives it a more honest feel, right? You might think that it actually continues across the front as one continuous piece. At least at first glance. 🙂

What do you think? Have you ever added decoupage to a glass cabinet before? How did it come out?
It was certainly an adventure finishing this one up. Glass breakage is always a possibility when working with large flat pieces like this one. So be sure to use caution!
Head over to my DIY Resources page for more help with your next furniture project!
To stay updated on my posts, enter your email below to be added to my mailing list.

Until Next Time,
KRay


It looks amazing! Thank you especially for the tips on adhering decoupage to the glass.
Thank you and you’re so welcome I hope it helped!
Exactly the post I was looking for. Thanks so much.
So happy to hear that! Anytime 🙂