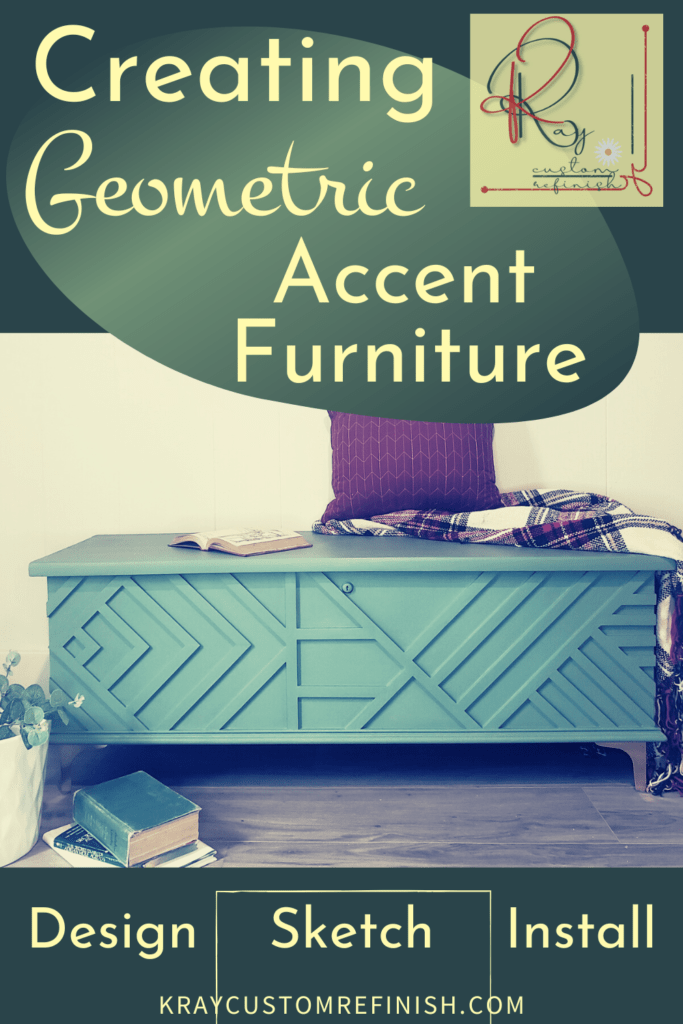
The first time I spotted a geometric accent wall while scrolling through Pinterest I did a literal double-take. It was the ultimate scroll-stopper. I know, I know, this post is supposed to be about creating geometric accent furniture, right?
That’s because my next thought, of course, was, “How do I use this on furniture?!”
Let me fill you in if you have no clue what I’m talking about. Geometric accent walls are all the rage right now. Instead of using a different color accent wall, there are geometric patterns and shapes added to the wall usually using trim boards, MDF, and even just tape and paint.
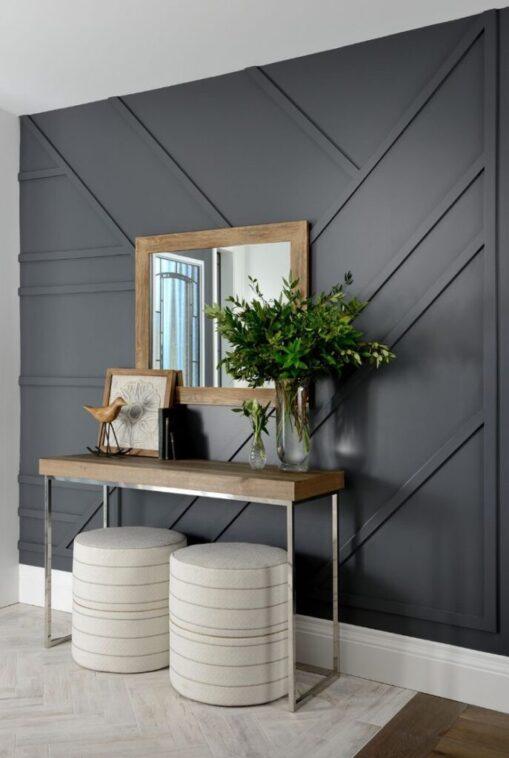

There are an infinite number of shapes, angles, and patterns that can be used as long as you plan it out right.
So why not scale that geometric accent wall design down to a geometric accent furniture design?
First off, choose the right piece of furniture for geometric accents
The best furniture type for adding geometric accents would have a decent-sized flat surface on the front of it—dressers with flat drawers, headboards, or chests are some common options that come to mind. Here is the piece I added the geometric accent pattern to:
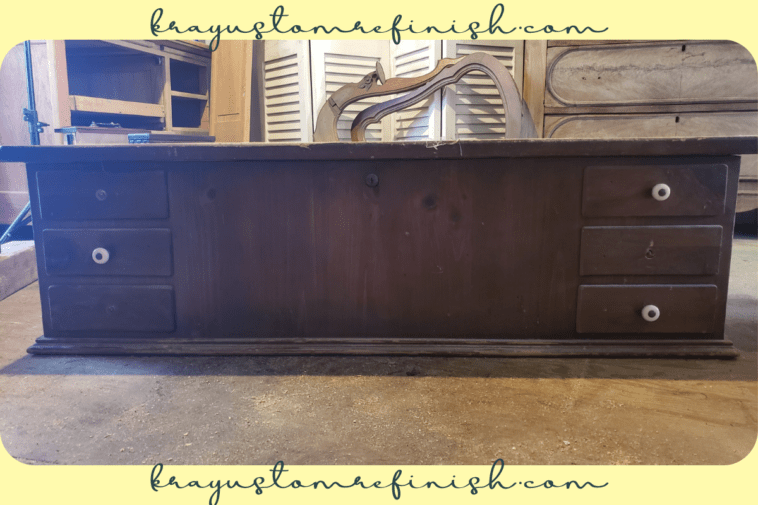
This Lane Love Chest my mother gave to me recently was the perfect choice for my first attempt at adding a geometric accent to a furniture piece.
The exterior had seen better days. Its original base and legs were partially broken off, and some areas had some lifting veneer.
It also had 6 small, “pretend” drawers across the front that I never could understand in the first place. They had pulls and everything but they didn’t open. Why?
Other than that the aromatic cedar interior was pristine, the lock worked, and it even still had the original “Lane Love” tag on the inside. Definitely worth saving!
Luckily those “pretend” drawers were easily popped off using a 5-in-1 and a mallet. Once those were gone I had a perfect surface to add a geometric accent design.
So you can go with a chest similar to mine, or really any furniture piece with a large enough flat surface. Anything with dips or divets will probably cause you trouble when you’re installing the design.
Once you have a furniture piece, plan out your geometric design.
The thing that makes these designs great is their “exactness” I guess you could say. The straight lines and angles need to be perfectly exact or else you’ll end up with something that looks sloppy and definitely not modern.
To get the angles and sizes right you’ll need to put together some sort of sketch, or model that is as accurate as possible. You can use the piece of furniture itself and tape or draw out your exact plan, or you can draw it out on paper.
I found that drawing it out was A LOT easier than anything else I tried. Now don’t worry, you don’t have to make this sketch true to size. I know it isn’t a wall but it is still furniture that tends to be larger than we can put on paper. So we will need to scale the image down.
Scale Down Your Measurements and Sketch the Outer Edge of the Surface
- Measure the height and width of the surface you’ll be using.
- Divide these dimensions by 2. If your piece is huge, you may need to divide it by 3 or 4 to fit it on paper.
- Draw the rectangle/square using these measurements for each line.
Example: If your surface is 30” L x 18” T you would draw something like this:
30”
9” |
My Lane Chest measured 42” long x 12” tall. So not huge, but still too large for me to draw out.
All I had to do to scale my sketch down was divide these numbers by 2.
This puts the sketch at a 1:2 scale, or half scale. Meaning all measurements on the sketch needed to be multiplied by 2 to determine the actual lengths needed in wood.
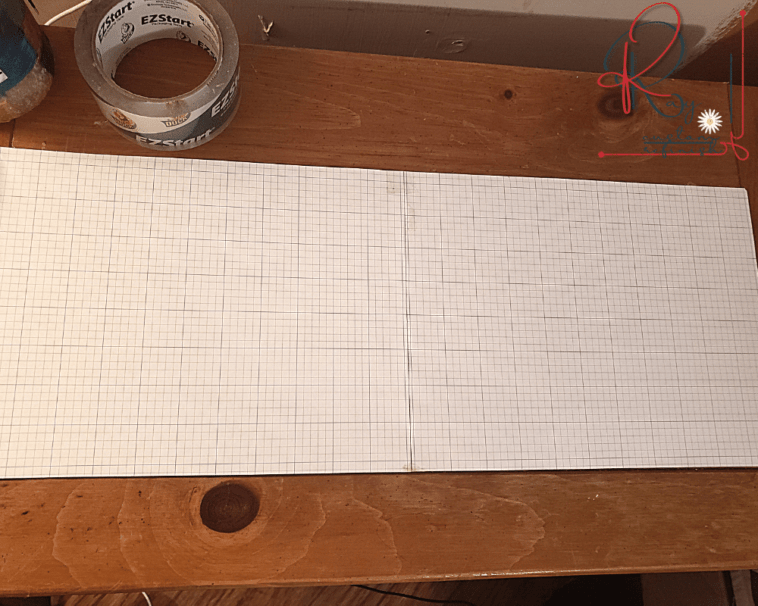
I had to fit a 21” L x 6” T rectangle on my paper to begin the sketch. Using graph paper helps keep your angles and sizes as exact as possible.
If you have a relatively new printer, you may be able to print out your own graph paper using one of the standard templates. (I was pretty excited when I figured out my Canon printer does this!)
So I printed out 2 sheets of graph paper on standard 8 1/2” x 11” printer paper, then taped the short ends together turning it into one 8 1/2” x 22” long sheet to work on.
Measure and Mark Out Any Hardware or Screw Holes
My chest had a small circle push-lock that could not be removed and I needed to work the design around it. If you have something like this on your piece or have hardware that will be added afterward, it would be a good idea to mark off the shape and size if it will affect your design in any way.
For my circle, I measured in from each edge, and down from the top to the edge of the lock and measured the lock. Then divided these measurements in half for my sketch, and drew the circle.
Now You Can Draw Your First Line
Once you have your rectangle, you can draw your first line. This line will be the starting point on which all other lines are based.
No Pressure.
It’s best to start on either end of the shape and draw a line connecting the bottom to one of the sides to start.
The video below shows the first line I drew for my design. I knew I wanted to do lines in a bunch of different directions, so I chose to make my first line as close as possible to the top but still on the side.
You can also choose to do your first line on the left side, higher, or lower on the side as long as the line is touching the top or bottom AND one of the sides.
Scale down the thickness of the trim you plan to use, and complete the first line.
If you’re planning to use 3/4” trim as I did, and your sketch is at a 1:2 scale, your drawing should show a 3/8” thick trim. (3/4” divided by 2)
If your sketch is a 1:3 scale, your drawing should show a 1/4” thick trim.
Measure that distance above or below your first line and make a few marks. Then draw the other side of your first line and you’ve got your first trim board!
If you work off of this first board sticking with either 45 or 90-degree angles, you should end up with a design that is modern in its exactness but also interesting and fun!
Getting into other angles is possible but tends to make the design look less “modern” and more “sloppy”.
Draw your second line at a 90-degree angle off of the first.
This was the simplest way for me to continue adding lines. You can do the next line parallel to the first if you want, or at a 45-degree angle instead. But things start to get a little tricky that way so use caution unless you’re great at math, which I admittedly am not.
I chose to do my second line at the very end of the first at a 90-degree angle, but you can do it anywhere on the line that works for you.
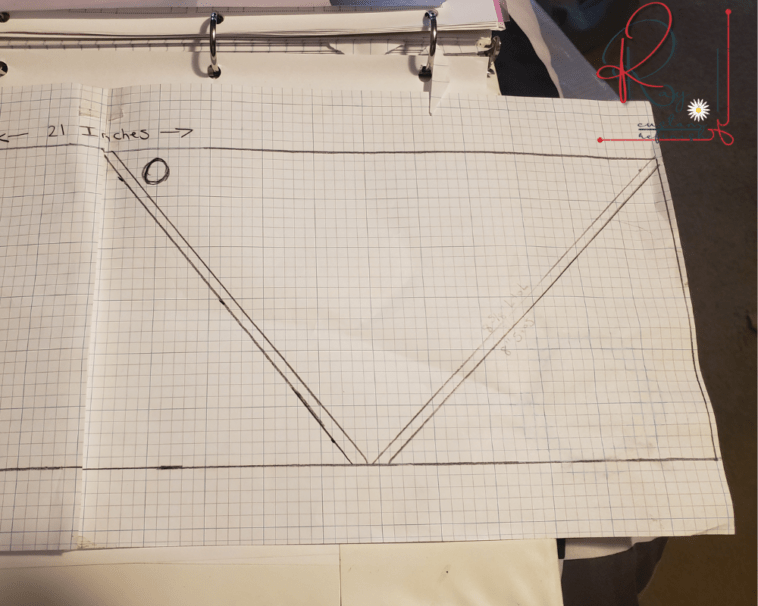
From here you can add a line 90 degrees off of the second or first line, whichever you prefer, and continue from there.
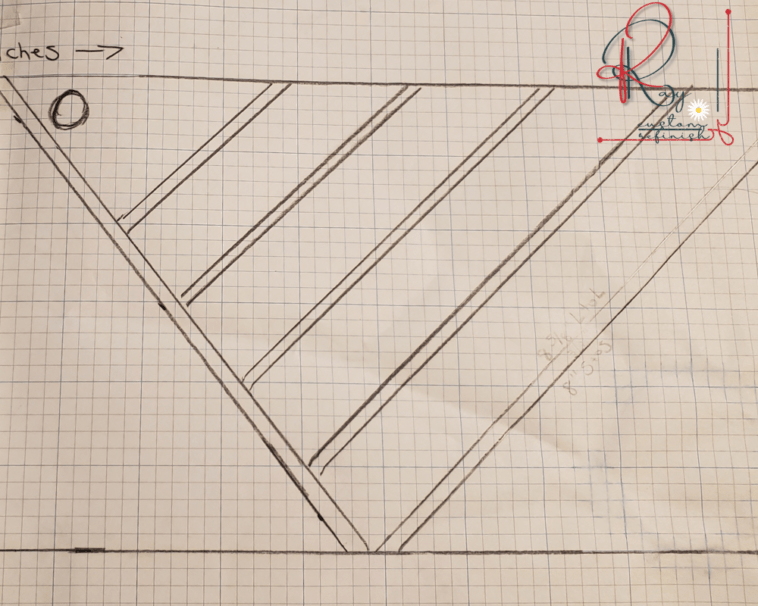
Once you’ve got a few boards down you should get into a rhythm and be able to complete your design in whichever way you’d like.
I actually had quite a few more boards drawn on my initial design but removed a bunch of them because it seemed a bit too busy for my taste. Less is definitely more when you’re going for a modern look.

Use Your Sketch to Determine The Number of Trim Boards You Will Need
Once you’ve got your design completed, use a ruler to measure each of the trim boards drawn.
Don’t forget that your sketch is scaled down!
Multiply each of the measurements by 2 if your design is a 1:2 scale, or by 3 if it is a 1:3 scale, and so on.
Some of your pieces will have angles on one end or both ends. Be sure to measure from the long end to the long end if any of the edges are angled to ensure you don’t short yourself.
I ended up needing 22 feet in total for my design. 3 8ft lengths of 3/4” trim boards were more than enough with room for a few errors.
Cut the Wood and Install the Geometric Design
Before you make any cuts, I recommend using a tape measure and double-checking that each piece looks like it will fit correctly. You can also tape the design on the furniture itself if you find that easier, but it just seemed like a lot more work to me!
If you trust your sketched design 100% you can cut your boards all at once and install them at the end. But I found it easier to cut each board one at a time and install them onto the piece one by one. This way you can check the angles and measurements as you go.
If you go off of your sketch, you may find that something was just a tiny bit off which would mean making all of your cuts multiple times!
What Tool Should You Use for Cutting 45-Degree Angles?
I will admit, my other half did this part for me. If you’ve seen our custom made products you know that he is much better at the construction side of things.
But I do know it is easily done with a Table Saw if you have a large enough space.
Here’s a great post on cutting 45-degree angles with a table saw if you need help.
If you don’t have a table saw, another great option would be a power miter saw, also known as a chop saw or a circular saw.
If you don’t have any sort of power saw, it is possible to cut 45-degree angles with just a hand saw. It might take a while, but it can be done. I found this great post that shows you how!
Before Installing, Lay Out Your Pieces in the Correct Positions
I was a little skeptical of the sizes my sketch gave me, so I wanted to double-check before making any permanent attachments.
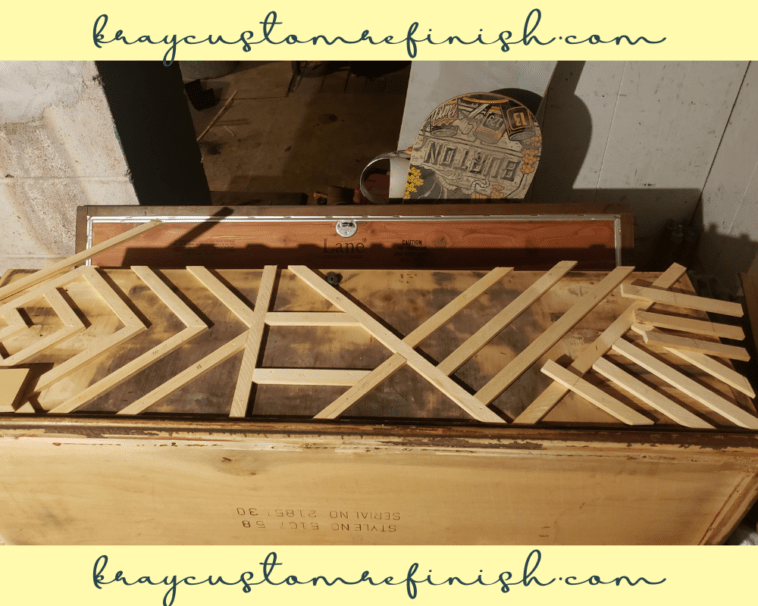
BONUS TIP: Before installing your pieces, fill any holes on your surface, sand, prime, and paint your surface the color you plan to paint the design!
I did not do this for this project (No idea how it slipped my mind. I think I was just too excited to see the design on the piece and skipped right over this very important step.)
It is MUCH easier to paint the design and create a cohesive surface if you fill any holes and pre-paint the surface. So definitely don’t do what I did! Obviously, it can be done after you install the design but I do not recommend it. Added a BUNCH of extra time to the project for me.
Related: Restoring Wood Veneer Furniture | Remove Repair Refurbish
Install the Trim Boards Using Adhesive or Nails
We chose to install the trim boards using only a small nail gun. The trim boards were thin, the chest wall was thin, and as it is inset, I didn’t think they would receive too much wear and tear.
Depending on the size of your piece, the thickness of the surface you’re attaching the boards to, and how much use the piece will get, you may need to use something larger. You can also add some adhesive along with the nails to hold the trim in place.
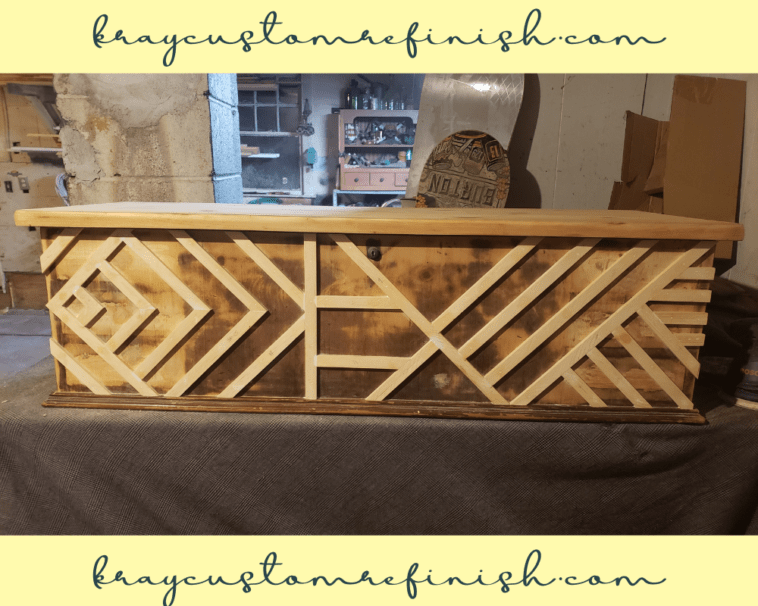
Prep the Piece For Paint
Hopefully, you took my advice on preparing the surface before installing your trim boards. So all you should have to do now is fill any nail holes in the trim, and, unless you’ve done it already, prime the boards.
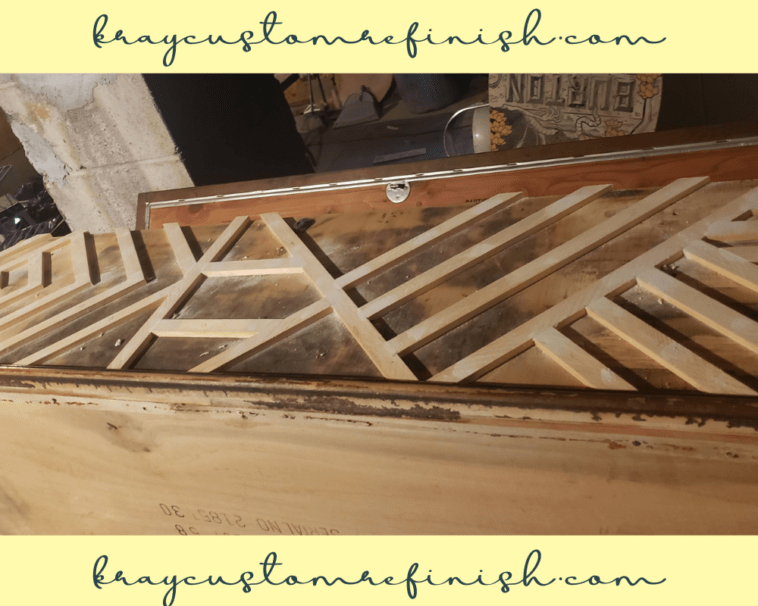
As you can see in the image above, I had to fill all the nail holes and a few other spots on the actual surface at this point. Which wasn’t horrible but sanding everything down smoothly wasn’t too fun.
Before your final paint color is added be sure that all surfaces and edges are completely smooth and even. If there are any gaps between the boards make sure you fill those as well.
Finally, Coat the Piece with a Matte Finish Paint.
You can use multiple colors here, or just one. I think the solid color design adds to the modern look here. But I have seen some two-toned geometric accents that are gorgeous as well!
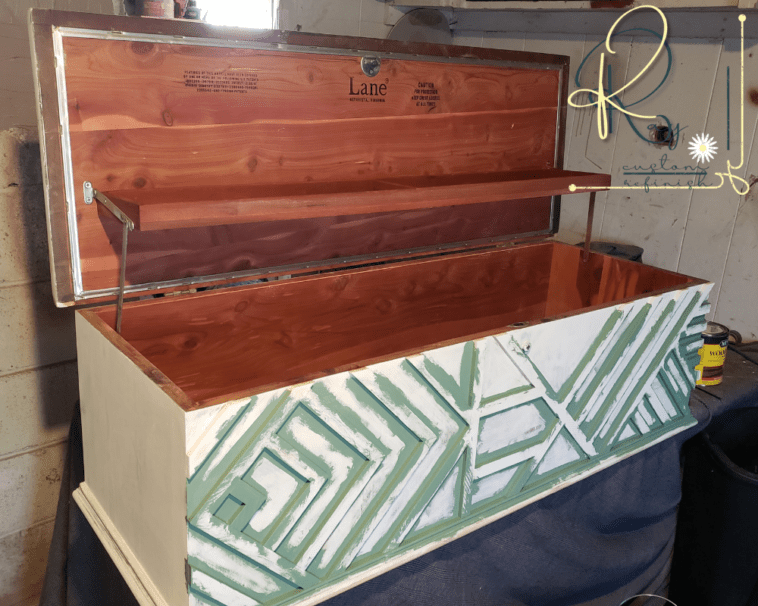
Cut in the edges of the boards first. Then coat the entire piece. You want it to be as smooth as possible which may mean multiple coats with sanding in between each coat.

Once the paint has dried, apply a sealer to the entire piece. This is also tricky with all of the edges and corners your design will have.
I chose to apply wax to this design which wasn’t too bad. I did end up having to skim some excess wax build up out of the cracks once it had dried.
For help with waxing your furniture head over to my post on using Antique Wax Glaze on Chalk Paint.
Add Some Modern Knobs or Legs to Finish it off
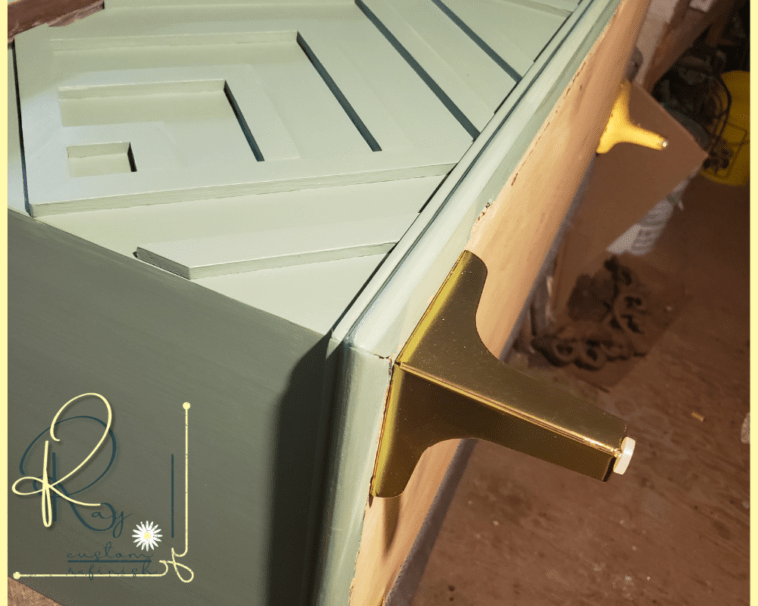
This piece didn’t have any hardware to be replaced unfortunately. But with the base already broken it was a perfect opportunity to just remove it and add some more modern legs.
I found the perfect legs on Amazon for this chest that pulled it all together nicely.
7 Inch SVISNA Silver Heavy Duty Feet
When you’re shopping for legs for furniture always make sure that the weight capacity is enough to hold your piece. These were rated 300lb weight capacity so I knew they’d hold up.
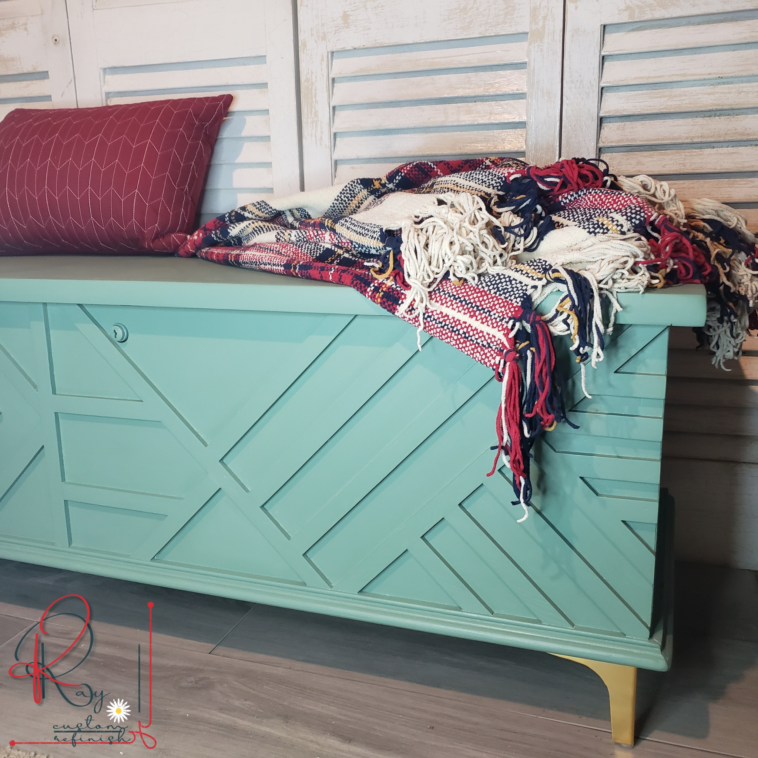
And there we have it! An incredible transformation. What do you think?

Although it looks super complicated, this was actually a pretty easy project. It was also scooped up in less than 2 days from my Facebook Shop. So if you’re still contemplating creating geometric accent furniture for your home, I say, go for it!
If you do, please share your final product with my in the comments below I would LOVE to see!
Enter your email below for access to tons of free downloads, tips, and tutorials sent right to your inbox!
Thank you for reading, and as always please feel free to comment with any questions or if you need help with a project. My next post will show you How to Create a Faux Raw Wood Furniture Finish That Looks Authentic.
Until Next Time,
KRay
