Water-Based Polyurethane Application – What You’ll Need


Water + Metal = Rust. Therefore water-based polyurethane and steel wool don’t mix. These between-coat finishing pads work great for removing any dust nibs or rough spots after your water-based polyurethane coat has dried.

Or:

If your piece has been stained or painted with an oil-based product, be sure to allow for proper cure time before beginning your water-based polyurethane application.
A good 3 days should be sufficient in the correct environment. The longer you wait, the better.
Applying water-based poly over oil-based stain or paint is possible, but if you don’t wait long enough between the two, your water-based poly may end up beading up when you apply it, and not adhere to the surface properly.
If you touch your stained surface and it still feels oily, it isn’t fully cured. If you’ve waited 2-3 days and the surface is still oily, try wiping it down with mineral spirits. Any stain that hasn’t fully cured will come off on your rag, leaving only the cured stain, and you’ll be good to go. (If after 2-3 days in the right conditions, it hasn’t cured, there was probably too much stain applied from the beginning.)
How To Apply Polyurethane Step by Step – Applying Water-Based Polyurethane Perfectly
I have yet to make videos for the water-based polyurethane application, but will be updating this post with them very soon!
The best advice I can give you for applying water-based polyurethane perfectly is to just get it on and leave it alone.
It will look very messy when you put it on, but water-based poly has an amazing ability to level itself out and dry smoothly. That is, only if you let it.
The more brushing you do, the messier it will come out in the end. It’s a tough skill to master, but once you do, it’s a cinch to apply perfectly!
First off, wipe your entire piece down with distilled water to remove any sanding dust and raise the wood grain.
Water-based products raise the grain on the wood, which will make it impossible to get a completely smooth surface with the polyurethane. So we want to raise the grain before applying the poly and sand it back to smooth. Then when we apply the poly, the grain won’t raise and create an uneven surface.
You can use a paintbrush, spray bottle, or wet cloth to wet your surface evenly. You should see some sort of darkening in the wood when you add the water.
Once it has lightened back up completely, you’ll know it’s dry. (Usually 30 minutes or so.) You should be able to feel the raised grain after wetting it.
Using at least 220 grit sandpaper or higher, lightly sand the raised grain back down.
You want to be very light-handed here. 1 or 2 passes over the entire surface tops. You don’t want to sand the actual wood itself, just the grain. If you sand into the wood again you may need to repeat the entire grain-raising process. Try using a piece of sandpaper thats been used already just to be safe.
There shouldn’t be much dust from doing this, but be sure to wipe down the surface again afterward.
Open and stir the water-based polyurethane slowly making sure to lift any settlement from the bottom of the can.
Do not shake water-based polyurethane or you’ll cause lots of bubbles! You can pour the poly into a plastic tub to be sure the settlement rises to the top as well.
Dip your synthetic paintbrush into the poly coating about 3/4 of the bristles, and let hang over the container for a moment to drip excess off. Or dip the entire flat surface of a foam applicator pad into the poly and do the same with the excess.
Don’t scrape the edge of the can or container with your brush or pad. Water-based poly dries very quickly and can leave hardened poly along the edges of your can. If you scrape your brush against it it will pick those little hard pieces up and you’ll end up with them in your finish.
Unlike oil-based polyurethane, you want to move quickly when applying water-based poly to your surface. Go from one end to the other working with the grain of the wood.
Keep a wet edge, meaning your next stroke should overlap about 1/2″ of the first stroke and so on. But otherwise, don’t go back over the poly once it’s on your surface.
It’s tough to do I know! It won’t look great when you apply your first coat, but it will even out.
Apply a thin coat to the entire surface quickly, and then leave it for 2 hours.
If you think you missed a spot, get it next time. You’ll do more harm than good if you try to apply more on top of already drying poly.
After 2 hours, sand down the poly with 220-grit sandpaper, or a between-coat finishing pad, until smooth.
As I said, water-based polyurethane is self-leveling, so you shouldn’t have too many brush marks if you apply it as I said. Any spots that you did touch after the first strokes will probably have brush marks. So sand those out if there are any. Then remove any sanding dust.
Do not use steel wool to smooth out water-based poly. Steel wool sometimes leaves small metal pieces behind, and you’ll end up with rust spots on your surface. Use a finishing pad instead to remove dust nibs.
Apply 2 more thin coats the same way, sanding between each coat and removing any dust.
3 coats should be sufficient for the protection of your piece.
If after 3 coats you’re still having issues with brush marks, try applying a final coat by wiping it on with a rag. (If you use the foam applicator I mentioned, you’ll have no problems with brush marks at all!)
Don’t thin it with anything, adding water to it only makes it dry even faster. Dip your rag into the poly and liberally soak it. Wipe it on the same way you would apply with a brush, in long strokes down the grain of the wood.
I’ve found that using a rag makes it easier for me sometimes to not go back over it and cause more problems. Just wipe down one way and back the other, no overlap necessary.
You’ll find less streaking and marks occur than when you’re brushing it on. It helps for the OCD part of me that just wants to smooth out each stroke!
Use an ultra-fine finishing pad to smooth out the final coat.
Clean up any dust and Voila! You should have a perfectly smooth water-based polyurethane finish.
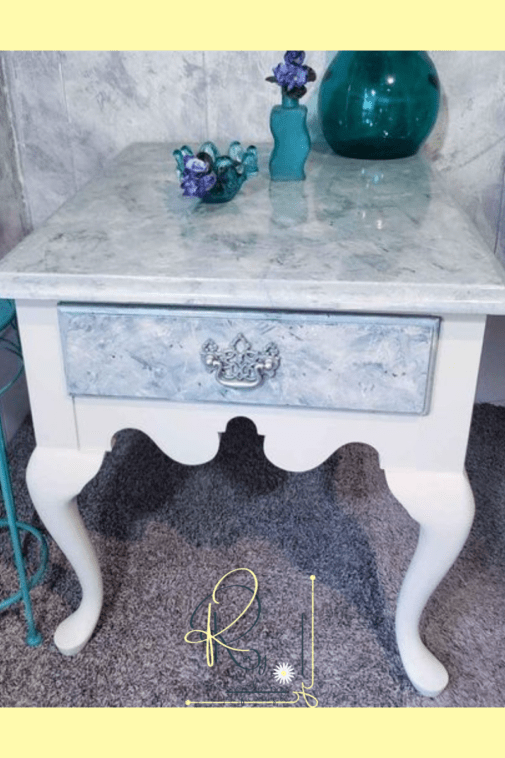
Looking for a high-gloss finish like on this Faux Marble Side Table? Check out how I did it here.


And that’s all there is to it! I hope that after reading this post, you feel confident in yourself applying polyurethane to whichever project you’re working on!
Remember to pin this post for the next time you’re finishing a project with polyurethane. I know I always need a quick refresher after a few weeks!
And if you have any issues with your polyurethane after it has cured, check out my Repairing Damaged Wood Finishes post for help!
Be sure to sign up for my email list to receive updates on new posts like this!

Until Next Time,
KRay


Such an informative article! All the information provided by you is really very helpful. By using tack cloth you can easily remove small dust particles from the surface and it also gives you smooth paint finishing. Thank you for sharing! Keep posting!
Thanks so much for your comment, glad you enjoyed my post 🙂 I 100% agree tack cloths work wonders when removing dust for applications like these. I’ll be sure to add that to my post!